MemberGate has several prebuilt landing pages that can be downloaded and added to your site - these can be found in the Landing Page Library and are free to use
However, as these pages are more complex than a standard content page - because of the integration of design and code - the process of adding them to your site is different and perhaps, more challenging
By following the steps outlined in the tutorial you can add a Landing Page to your site
Please Note: As these pages have already been pre-designed for use, they contain additional code and are not the same as a standard Content Page and so you must follow the guide carefully.
Four Steps to Adding a Template
- Prepare your Content Page
- Copy and Paste the Template Code to the Content Page
- Prepare the Content Page for Customization
- Customizing and Editing the Text
Instructions to Add a Landing Page
Preparing Your Content Page for a Landing Page
A landing page will likely go on a public content page.
Please follow the below details to find the settings that are best for a landing page.
- From the control panel choose 'add content' and use the following field settings below
- 'Department' choose the Work Pages
- 'Content Page Full Width' choose Yes, Full Width
- Add a Headline Surrounded by pipe symbols. The headline would look like this: |This is the Headline Field|
- Set the Left and Right Nav so they do not show
- A Landing Page may have a custom header and/or footer built as part of the page. If they have a header and footer, in the 'Show Header and Footer on this Page' choose 'Don't Show Header or Footer'
- 'Print Page Options' - choose 'Don't Show at All'
How to Add the Template Code to a Content Page
1. Copy/Paste the Style Code
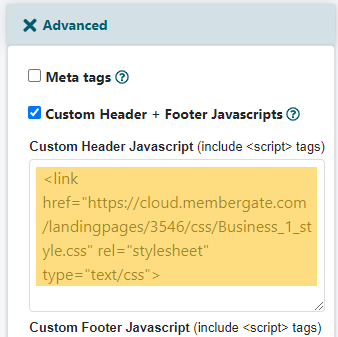
On the right side of 'add/edit content', click on the Advanced Tab and the 'Custom Header & Footer Javascript' box
Copy the 'Custom Header & Footer Javascript' code from the desired landing page Template Code page and paste it into the 'Custom Header' box
2. Copy/Paste the Main Body Text
In the 'Content' box, click on the <> in the WYSIWYG editor to open the Source Code box.
Copy the 'Content' code from the desired landing page Template Code page and paste it into the Source Code box.

Customize
After adding the styling and the html code has been added to the page, it's time to start customizing!
If using the WYSIWYG editor, it should be disabled for editing as it might be possible to write over the existing html code when editing directly in the WYSIWYG editor.
To disable: UNClick the box on the 'Use WYSIWYG on this Page?' as seen below:

Apply Changes
Click the 'Re-Edit this Content Page' Button
Depending on your abilities, the code and css can be edited as needed and/or desired.
New images can be uploaded and text can be rewritten. For best results we suggest trying to keep the text and/or headlines around the same word count as is on the landing page.
How to Customize the Text on the Template Page
A. Open the Live Template Page in one Window and the Edit Screen in another Window
This will allow you to customize the text in an easier manner. You will be able to see the text on the live page which will help you to find if it is a title, subtitle or description so that the entered text will fit the page.

B.Finding the text on the Edit Screen
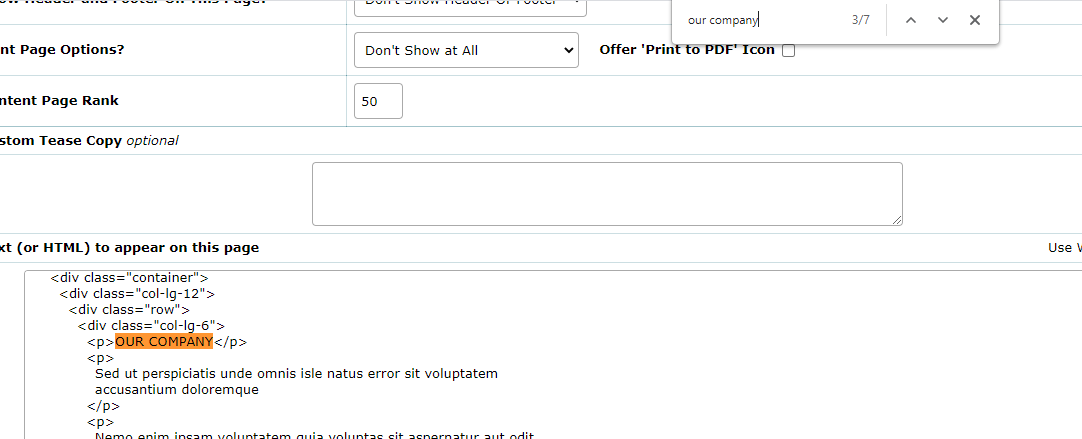
The easiest way to find a specific line of text in the edit screen is by performing a search. A search can be completed by choosing CTRL-F (or Command-F on a MAC).
Type in the text that you wouldl ike to find on the page into the search box. Once that is found, the new text can overwrite the placeholder text.
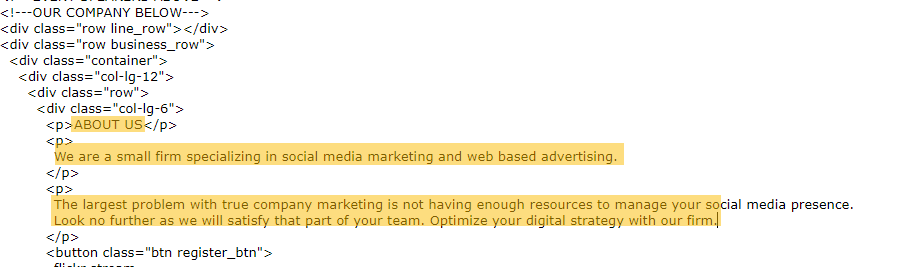
Most of the text is broken out away from the coding to aid in finding and replacing only the text.
IMPORTANT NOTE: DO NOT DELETE ANY OF THE CODE.
Code includes anything between angled brackets < and >