
Have you received a dreaded bounce back message that says that your email box is full? Many times the email message will come from the System Administrator and may look something like this:
From: "System Administrator" <>
Date: March 31, 2016 at 5:25:16 AM EST
To: [email protected]>Webmaster
Subject: Mailbox size limit exceeded
The size limit of 50 MB for mailbox '[email protected]' has been exceeded. Incoming mail is currently being rejected.
How to Fix the Problem
There are two choices to remedy: add more space to the email account or to delete the existing messages that are being saved on the server. Both of those options are completed at your hosting account. As most MemberGate sites are being hosted with Hostek, the following instructions will include the steps to take in your Hostek control panel. If your site is hosted with another company, please refer to their support team for further assistance.
**With both methods, the first step requires you to Login to the Hostek Control Panel here: https://wcp.hostek.com
Add More Space to Existing Email Accounts:
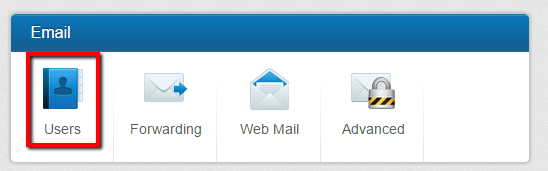
1. Under the Email Section Click the Users icon
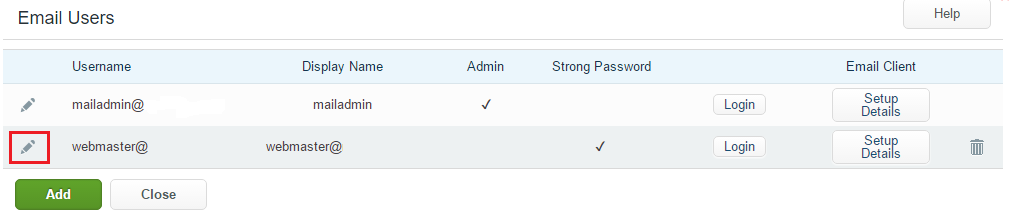
2.Click the pencil icon next to the User that needs more space
3.In the Mailbox Size (MB) field, enter a larger number to add more space to the mailbox. The number will be the available space in megabytes.
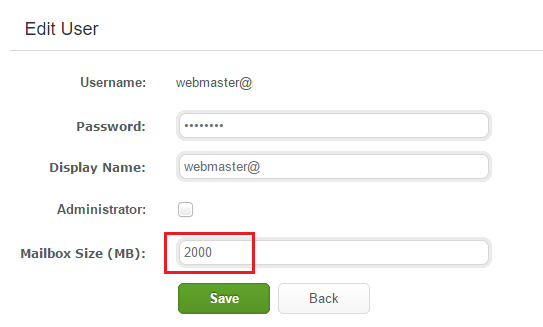
4. Click the Save button
Clearing Existing Email Messages
1. Under the Email Section Click the Users icon
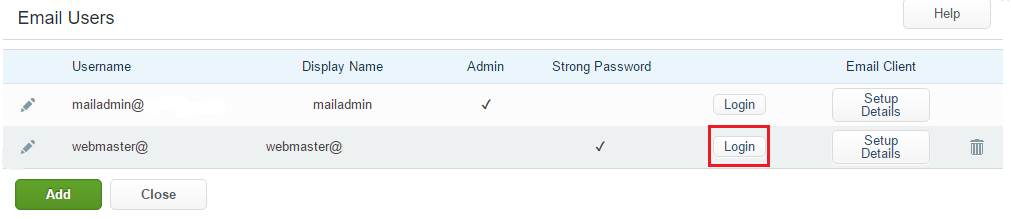
2. Click the Login button next to the User that needs email cleared to Login to Smatermail
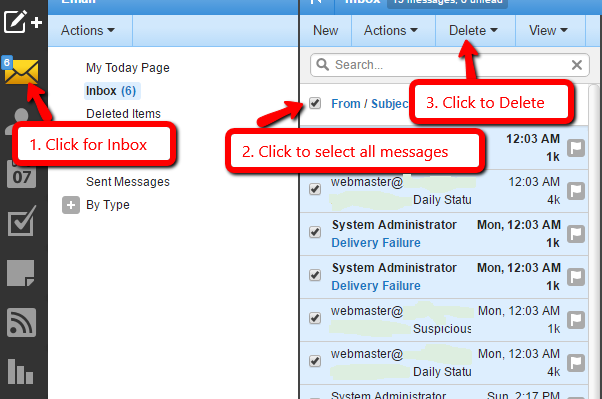
3. From the inbox, check the box on top to select multiple email messages at one time, or manually click the box next to each individual message and click delete from the top nav.
4. Choose Settings --> Click the Forwarding Tab --> Check the box that says 'Delete Messages When Forwarded' --> then press 'Save'. Moving forward, email messages will not be saved on the server to fill the box.
