
Step-by-step tutorial
Page Library
Step-by-step tutorial
A tutorial page for members of a creative community, laid out so a lesson is easy to follow away from the screen. This sample teaches golden-hour portraits: what to bring, a table of starting camera settings, seven numbered steps from scouting to editing, common mistakes and a practice assignment. Use it as the pattern for any how-to lesson in your library. Keep the structure, replace the steps, table and photos with your own technique, and link the practice assignment to your current challenge or forum.
Golden-hour portraits, step by step
For about an hour before sunset, the light turns warm, soft and low. It flatters every face and makes backgrounds glow. Here is exactly how to use it for portraits that look effortless.

What to bring
- Any camera that lets you set the aperture. A phone in portrait mode works too.
- A lens between 50mm and 135mm if you have one. Longer lenses blur the background more.
- A reflector, or a large piece of white foam board from a craft store.
- A lens hood, to cut down flare when you want to control it.
- A sunset time from your weather app. Arrive 75 minutes before it.
Starting settings
These are a starting point, not rules. Check your screen after the first few shots and adjust.
| Setting | Backlit (sun behind subject) | Side lit (sun to one side) | Why |
|---|---|---|---|
| Mode | Aperture priority or manual | Aperture priority or manual | You control the background blur. |
| Aperture | f/1.8 to f/2.8 | f/2.8 to f/4 | Wide for blur; a little narrower to keep both eyes sharp. |
| Shutter speed | 1/250s or faster | 1/250s or faster | Freezes movement and hair in the breeze. |
| ISO | 100 to 400 | 100 to 400 | Raise it as the sun drops. |
| Exposure compensation | +0.7 to +1.3 | 0 to +0.3 | Bright backgrounds fool the meter into making faces too dark. |
| White balance | Daylight or 5600K | Daylight or 5600K | Auto white balance cools the warm light you came for. |
| Focus | Eye detection, single point | Eye detection, single point | The nearest eye must be sharp. |
The seven steps
- Scout the light. Arrive early and walk the location. Look for an open spot facing the sun with a clean background behind your subject: grass, trees or water, not cars or buildings.
- Put the sun behind your subject. Turn your subject so the sun is behind them and a little to one side. You will see a warm outline, or rim light, appear on their hair and shoulders.
- Bounce light back into the face. With the sun behind, the face is in shade. Hold your reflector low and in front, angled up, until the face brightens and catchlights appear in the eyes.
- Expose for the face. Set exposure compensation to about +1 and check your screen. The sky may look bright, and that is fine. A well-lit face matters more than a perfect sky.
- Decide on flare. For clean, contrasty shots, use your lens hood and block the sun with your subject's head. For a dreamy look, let a sliver of sun peek past their shoulder.
- Direct with movement. Stiff poses look worse in soft light. Ask your subject to walk toward you slowly, tuck their hair behind an ear, or look at the horizon and then back at you.
- Edit gently. Lift the shadows a little, warm the white balance by 200 to 300K if needed, and add a soft vignette. Resist heavy orange filters; real golden light is subtle.
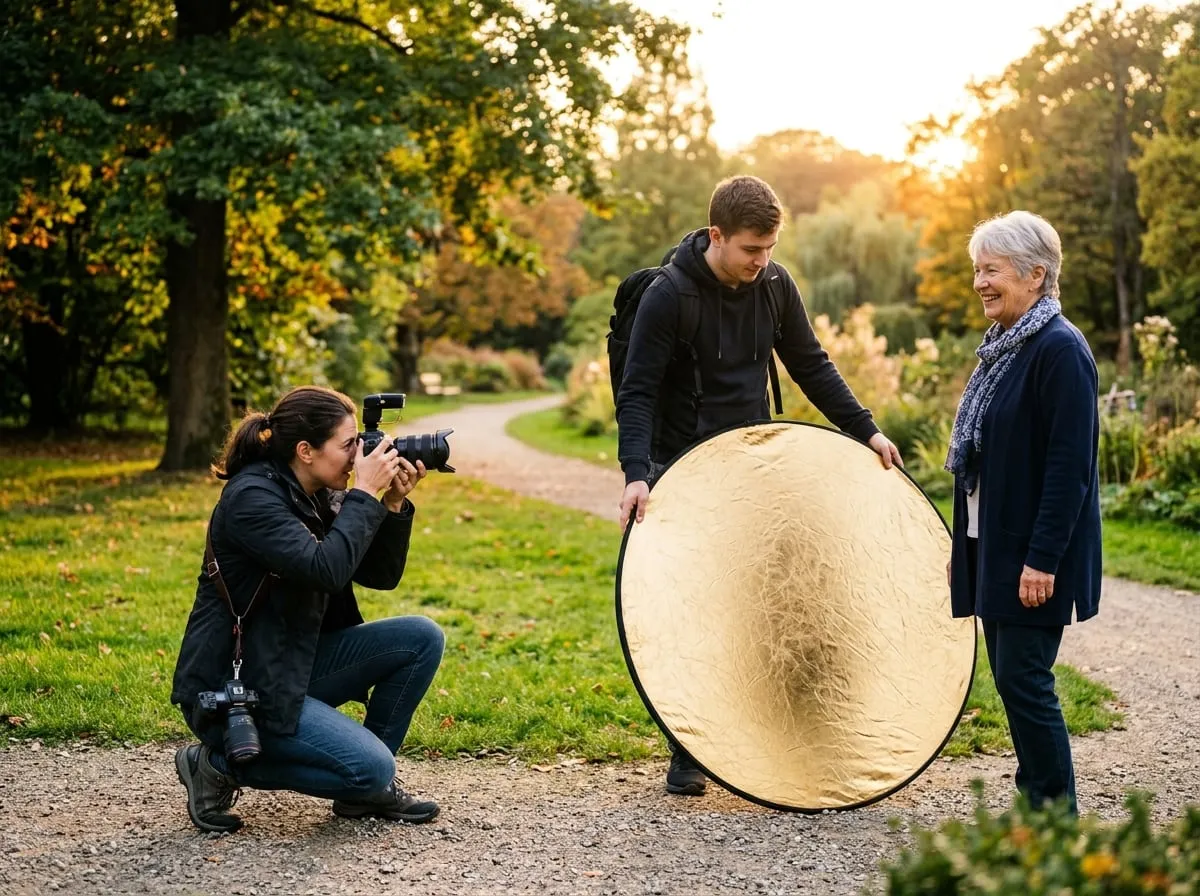
Just as the sun touches the horizon, turn your subject to face it. The light is now so soft and low that you can shoot front lit with no squinting, and skin glows.
Common mistakes
Silhouettes by accident
The camera exposed for the sky. Add exposure compensation or use spot metering on the face.
Missed focus
Flare confuses autofocus. Shade the lens with your hand, focus on the eye, then shoot.
Arriving too late
Golden hour is shorter than its name. In summer, the best light can last just 30 minutes.
Washed-out color
Too much flare lowers contrast. Move a step so your subject blocks more of the sun.
Your practice assignment
Shoot one person three ways in a single golden hour: backlit with a reflector, side lit, and front lit in the last ten minutes. Post your favorite of each in the Portraits forum with your settings, and tell us which you prefer and why.
Use this page
Make it yours in a few minutes
- Find it in your Control Panel. Go to Content > Page Library and search for "Step-by-step tutorial".
- Add it to your site. Choose a title and a department. The page arrives as a draft, with its pictures copied to your site and your site's name already in place.
- Change the words and pictures. Open it in the Membergate editor, replace the sample text and images with your own, and make it live when you are ready.