A lesson is the area where the formal instruction will be provided.
Please review the step by step graphical instructions below to create your programs lessons.
Editing an LMS Lesson can be found under Content LMS Lessons

To Create a New Lesson:
Choose 'Create New Lesson' from the drop down menu and click the button.
To Edit an Existing Lesson
- Click on the drop down menu, and select the Lesson to Edit
OR TO FIND THE lesson FASTER - Click in the drop down menu and begin typing a keyword in the Lesson. The software will pare the list to only those Lessons with the keywords. Select the Lesson to Edit
- Click the button.
Click on each section to expand for more information.
Lesson
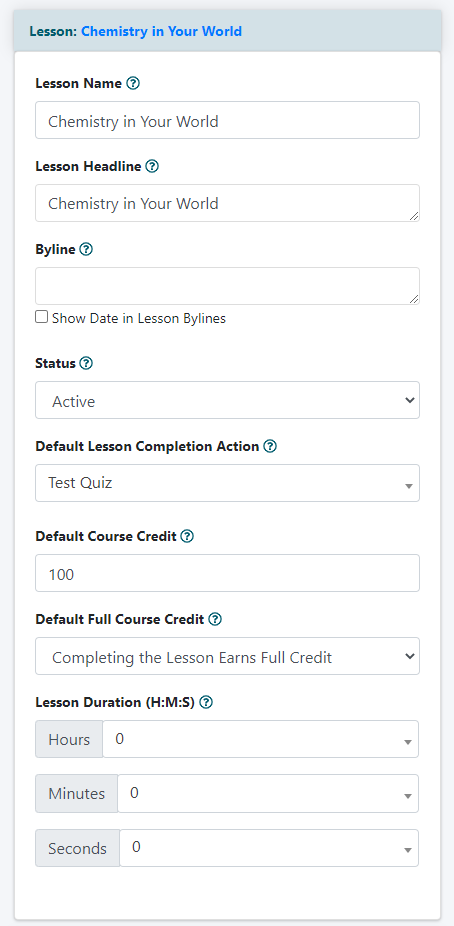
Lesson Name
Enter a Name for the Lesson
The Lesson Name will Appear for the user in the Course Outline
Lesson Headline
Enter a Headline for the Lesson
The Headline of the Lesson will appear at the top of the actual Lesson Page
Byline
Enter a Byline for the Lesson (Optional)
The Byline will appear under the Headline on the Lesson Page
Status
Choose a Status from the drop down menu
A status of 'active' means the Lesson can be published as part of the Course.
A status of 'inactive' means the Lesson will not be seen or published as part of the Course.
Default Lesson Completion Action
Choose a Completion Action from the drop down menu
There are various options to allow a user to 'complete' a lesson.
NOTE: The Quizzes, Surveys and Assessments have to be created outside of the Lesson page first, and then they can be selected as a Completion Action.
Click on each tab for more information about the different Completion Action options.
Tracking
Selecting an option under the 'Tracking' completion action option means that the LMS will automatically mark the Lesson as completed after the specific tracking action has been met.
The user does not have to manually take an action to move on to the next lesson with any 'tracking completion' setting.
5 Tracking Options for Completion
Choose one of the tracking completion actions from the drop down menu.
Complete Lesson on Page Load - After the lesson page has loaded, the system will consider the user has completed the course.
Complete Lesson After Default Period - After the lesson page has been loaded for the set default period of time, the system will consider the user has completed the course. The default lesson complete period can be set up in the LMS Settings option.
Complete Lesson After Lesson Duration - After the lesson page has loaded for the total lesson duration set on the lesson page, the system will consider the user has completed the course.
Complete Lesson On Clicking Next Lesson - After the user has clicked on the Next Lesson button, the system will consider the user has completed the course.
Complete Lesson on Media Completion - After the media loaded in the Media Resources field has been watched or listened though completely , the system will consider the user has completed the course. *Can only be selected when media has been uploaded to the lesson.
Course Outline: Checked Lesson Box
After the user has completed the lesson based on the completion setting, the lesson box will show a checkmark. A checked lesson box signifies all of the lessons that have been completed.
Confirmation
Selecting the 'Confirmation' completion action option means that the user can manually click the 'Confirm Session' button at the bottom of a lesson to set the lesson as finished.
After the user has confirmed the session, the lesson box will show a checkmark. A checked lesson box signifies all of the lessons that have been completed.
In the 'Default Lesson Completion Action' box select 'Confirmation' to give the user the option of when they would like to have the lesson marked as completed.
Quiz
Selecting a 'Quiz' completion action option means the selected quiz will be automatically added to the bottom of the lesson. The user will have to correctly answer the questions to the quiz.
The user will have to reach the passing score of the quiz to move on to the next Lesson.
When the user has earned a passing score, the lesson box will show a checkmark. A checked lesson box signifies all of the lessons that have been completed.
To Set a Quiz as the Completion Action:
In the 'Default Lesson Completion Action' drop down menu, select the name of the Quiz to be added at the end of the lesson which can be found under the 'Quiz' section.
Survey
Selecting a 'Survey' completion action option means the selected survey will automatically be added to the bottom of the lesson. The user will have to complete the questions of the survey before moving on to the next lesson.
When the user has finished the survey, the lesson box will show a checkmark. A checked lesson box signifies all of the lessons that have been completed.
To Set a Survey as the Completion Action:
In the 'Default Lesson Completion Action' drop down menu, select the name of the Survey to be added at the end of the lesson which can be found under the 'Survey' section.
Assessment
Selecting an 'Assessment' completion action option means the selected survey will automatically be added to the bottom of the lesson. The user will have to complete the questions of the assessment before moving on to the next lesson.
When the user has finished the assessment, the lesson box will show a checkmark. A checked lesson box signifies all of the lessons that have been completed.
To Set a Assessment as the Completion Action:
In the 'Default Lesson Completion Action' drop down menu, select the name of the Assessment to be added at the end of the lesson which can be found under the 'Assessment' section.
Default Course Credit
Set the number of Credits the user will earn for finishing the lesson
Default Full Course Credit
Choose if the user will receive full credit or if they can earn partial credit
Partial credit can be earned when a completed quiz or assessment does not reach a specific score.
Lesson Duration (H:M:S)
Select the recommended number of Hours/Minutes/Seconds it may take to finish the lesson (Optional)
*If the time is set to 0:0:0, no time will be shown along the Lesson.
Lesson Content
The information that will be shown on the lesson page will be added here.
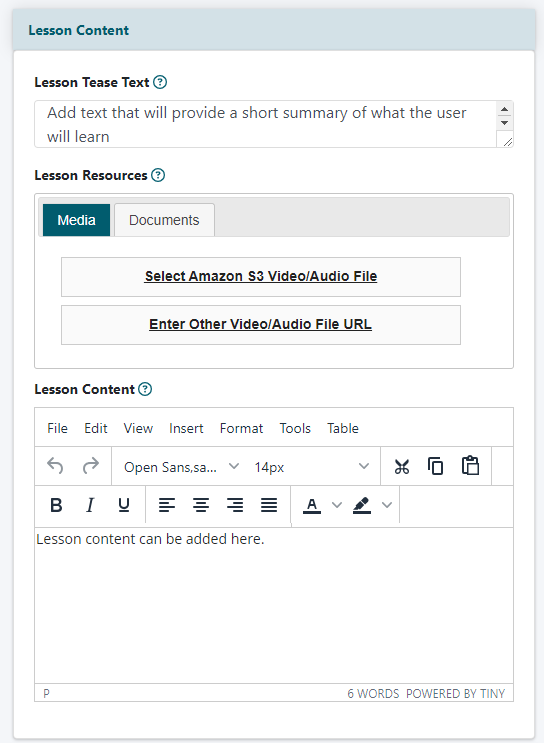
Lesson Tease Text
In the 'Lesson Tease Text' field add a short summary of what the student will learn in the Lesson.
The Lesson Tease Text will appear for the user under the sections available in the course or in the dashboard.
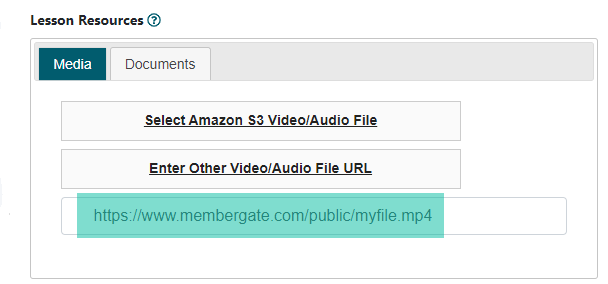
Lesson Resources
Media
Streaming a video or audio file directly from the Lesson Overview page is easy with the 'Lesson Resources' field. The video or audio file can be selected directly from an Amazon S3 account or through a URL of the file stored at any other storage location.
The software will automatically add the video or audio file to a player, and will display the player at the top of the Lesson page.
If you would like the player to display in a custom location on the Lesson page, add |media| where you would like the player to appear on the lesson page.
Documents
Making downloadable companion files or resources available from the Lesson page is easy with the 'Lesson Resources' field. The downloadable files can be selected directly from an Amazon S3 account, through a URL for the file stored at any other storage location or uploaded directly to the editing Lessons page.
The software will automatically add files to the Lesson page as additional Resources and will display the files at the bottom of the Lesson page.
The file types that can be offered as download files are: pdf, doc, docx, xls, xlsx, zip
Lesson Content
The main text and graphical content for the Lesson can be added to the Lesson Content field. The WYSIWYG editor can be used for additional formatting of the Lesson text.
Detailed Instruction to Add a Media Player
Please click on each tab below for further information and instructions on adding a player to a Lesson page.
Select a Media File from an Amazon S3 Account
1. Select the Media tab from the 'Lesson Resources' field.
2. Click on the Select Amazon S3 Video/Audio File link. This will open up your folders stored at Amazon S3.
3. Select the folder where the audio or video file is located.
4. Select the File Name of the video or audio file.
5. The full url of the stored file will appear under the media options. This is the video or audio file that will appear on the lesson page.
Stream a Media File from any Other Cloud or Storage Area
1. Select the Media tab from the 'Lesson Resources' field.
2. Click on the Enter Other Video/Audio File URL link. A new text field will open.
3. Enter in the URL of the video or audio file in the new text field.
Detailed Instruction to Include a Downloadable File
Please click on each tab below for further information and instructions on adding a player to a Lesson Page.
Include Downloadable Files Stored at an Amazon S3 Account
1. From the 'Lesson Resources' field, select the Documents tab.
2. Click on the Select Amazon S3 Document File link. This will open up your folders stored at Amazon S3.
3. Select the folder where the downloadable resource is stored.
4. The files available in the directory will be displayed.
5. Select the name of the file(s) to be downloaded with this Lesson. More than one file can be chosen. The selected files will appear at the bottom of the lesson page.
Upload Files Directly through the Lessons Edit Page
1. From the 'Lesson Resources' field, click on the 'Documents' tab.
2. Click on the Upload Document File link. A box will open for you to select the file from your local drive.
Include Downloadable Files Stored at any Other Cloud or Storage Area
1. From the 'Lesson Resources' field, click on the Documents tab.
2. Click on the Enter Other Document File URL link.
3. A new field will appear. Enter the URL of the stored document for download in this Lesson in the box and click on the + sign to add it.
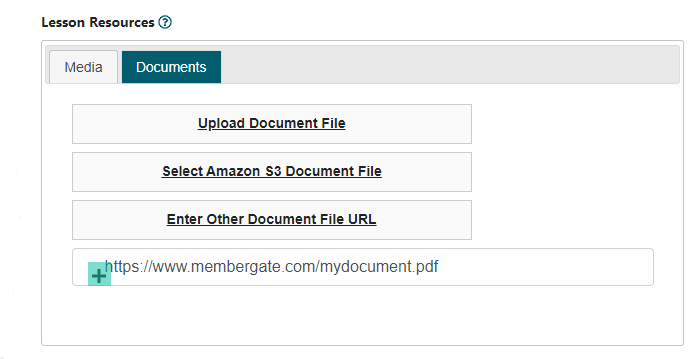
4. Additional files can be added using the same steps as in step 4. After clicking on the + sign, the added files will appear under the listing.
Lesson Images
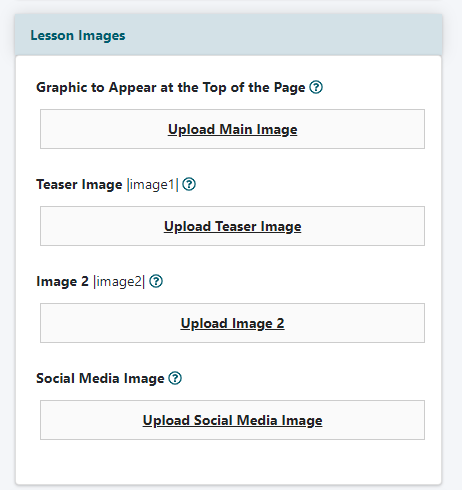
Main Graphic
The graphic shown at the top of the Lesson page is considered the 'Main Graphic'.
Click on the Upload Main Image and choose the image from your local drive.
Teaser Image |image1|
The graphic shown in the teaser next to the lesson description or tease copy can be uploaded into the image 1 field.
Click on the Upload Teaser Image and choose the image from your local drive.
Image 2 |image2|
Images shown on the lesson pages can be uploaded through the image placeholders - Image 2 through Image 20.
Click on the Upload Image and choose the image from your local drive. A new placeholder will appear to upload other images.
Place the image within the Lesson Content box using the appropriate image placeholder. The image placeholder can be added where you would like the image to appear. |image2|, |image3| etc
Social Media Image
The graphic shared on social media sites can be uploaded.
Click on the Upload Social Media Image and choose the image from your local drive.
Display
Click on the Display box to open the section.
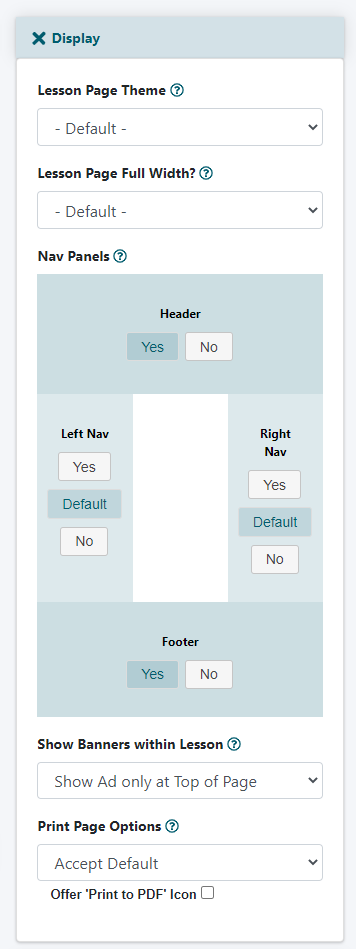
Lesson Page Theme
If a different theme is desired for this page, select it from the drop down menu.
Lesson Page Full Width
By default the page width is that set by the theme. If the page width should span the full width of the screen select 'full width' from the drop down menu.
Nav Panels
Click the Yes or No buttons to include or remove the specific nav panels on the lesson page. Choosing Default will take on the properties set in 'Master Template'.
Show Banner Ads
If banner ads should be shown select which ones from the drop down menu. The banner ads are added to the site via 'Edit Site Descriptions' in the 'Public and Member Top and Bottom Banner Ad Script' boxes.
Tagging
Click on the Tagging box to open the section.

Article Tags
Add specific tags for this lesson page. A tag is a grouping of like lessons. A user can click on the tag name which will display all pages with that same tag.
Content Page Settings
Click on the Content Page Settings box to open the section.
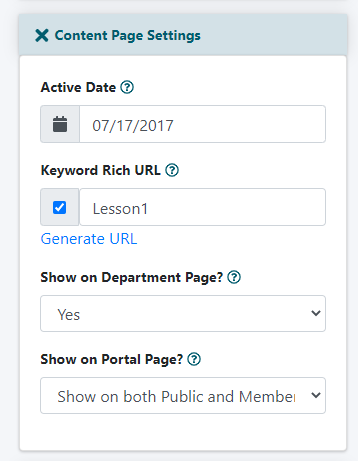
Active Date
Choose the date live date for the lesson.
Keyword Rich URL
Check the box for a keyword rich url for this page. Enter custom keywords, or click generate url to automatically create one based on the lesson headline.
Show on Department Page
Choose if you would like the lesson and tease information published on the department page.
Show on Portal Page
Choose if you would like the lesson and tease information published on the portal pages.
Advanced
Click on the Advanced box to open the section.
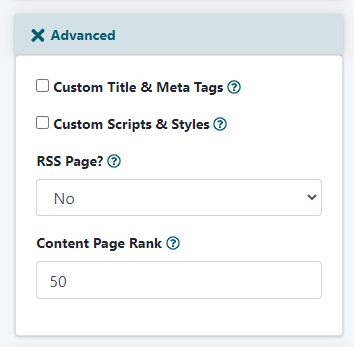
Custom Title and Meta Tags
Check the box to input custom title, meta keywords or meta descriptions.
After the box is checked, new fields will open. Enter the meta title, keywords (separated by commas) or meta description.
Custom Scripts and Styles
Check the box to input custom scripts and/or styles.
After the box is checked, new fields will open. Anything that is necessary for the header can be added to the 'custom header' box. Anything that is necessary for the footer can be added to the 'custom footer' box.
RSS Page
Choose if this lesson page will be sent out on your RSS Page.
Content Page Rank
The content page link rank arranges where on the listing of other lessons and articles where this lesson will appear.
The active date of the lesson will arrange the lessons first, and if two lessons have the same active page the content page link rank will arrange those pages.
The ranking can be from 01-99. The lower number will appear higher on the listing, a higher number will move the lesson tease lower on the list.
LMS Tagging

Adding tags to each lesson can be important when setting up sections, courses, and degrees. It helps you to set up a filter so the content can be found easily when setting up other sections of the LMS
In the LMS Tagging field, enter the tags associated with this Lesson. If the tag has already been created, choose it from the listing which will appear once you begin typing in the box.
Save the Lesson
The Lesson can be saved by selecting the button or button found at the very bottom or the Lesson editing page.