Adding a Google Map to your site requires a one time connection to your Google Maps API, and then you can create as many different maps as desired to add to your pages.
Click on the tabs below for step by step details.
Connect Google Maps API Key to your MemberGate site
This action only has to be completed one time. It must be completed before making any maps.
Follow these steps
Visit the Google Console Website
Google Cloud Console website: https://console.cloud.google.com
*If you do not have a Google Cloud Console account, you will need to create one. If you already have an account, sign in.
Enable the Maps Javascript API and the Geocoding API
Visit the Maps Javascript API and click the Enable button
Visit the Geocoding API and click the Enable button
Set up the API Key for the Map
Go back to the https://console.cloud.google.com and navigate to the APIs & Services section in the sidebar menu.
Click on the Credentials tab and then select Create Credentials and choose API Key.
From the credentials page, set a name for the map
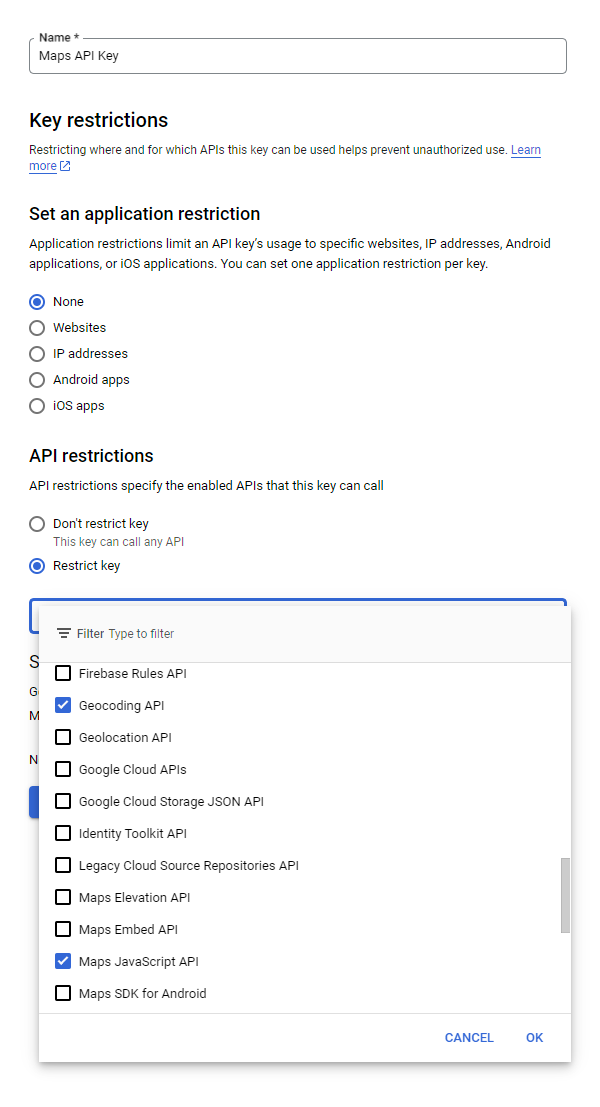
API Restrictions
Click 'Restrict Key'
Select the Geocoding API and the Map Javascript API
Copy the Key
Once you have created the API key, copy the key
Paste the API Key in Your MemberGate Site
The Map Settings can be managed under Tools Mapping
Click on Mapping Settings
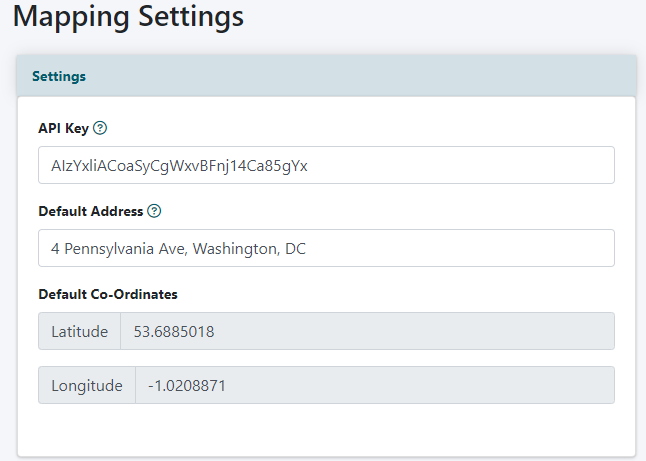
Paste the Google Maps API Key into the first field
Default Address (optional) - Enter a default street address to center the map. This is the address that can be set to be the center of any map created.
Save the Settings
Click on the button
Step 1. How to Create a Map
Mapping
A Google Map can be created and managed under Tools Mapping
Select a Map
Choose Create New Map and click on the button
Map Settings
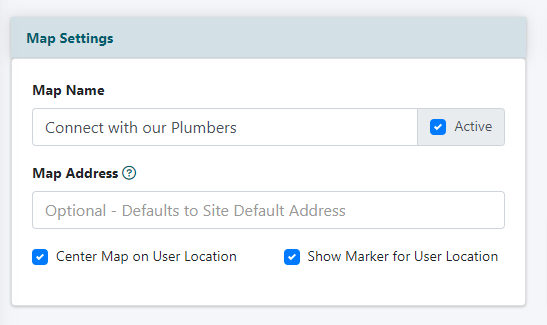
Enter a Descriptive Name for the Map
Map Address (optional) - Enter an address for the map if different than the default address in settings
Center Map on User's Location - A check in this box will allow the software to display the user's address as the starting point for the map.
Show Marker for User Location - A check in this box will input a location marker on the map of the user's location.
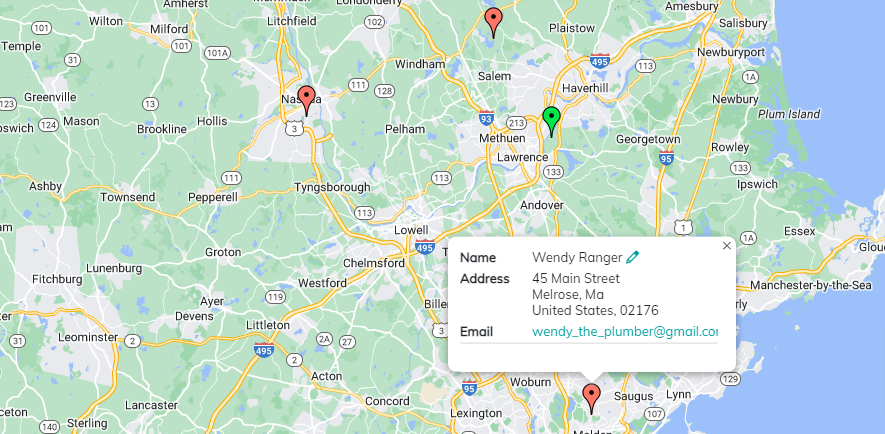
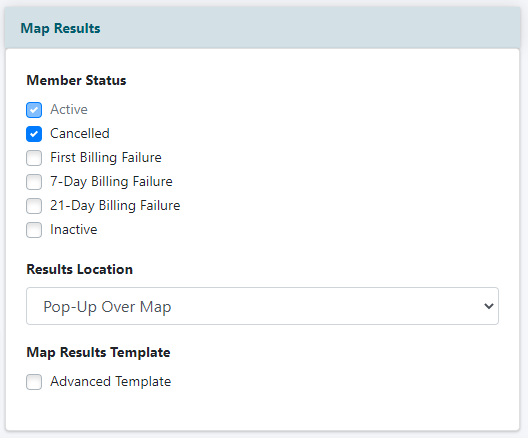
Map Results
Member Status - Click to check the box if a member with this status will still appear in the map search results.
Results Location - Choose an option from the drop down menu.
Pop Up Over Map will show the user's address information on top of the map.
Below Map will list the addresses for the search results below the search boxes under the map.
Save
Click the button
Step 2. Add the Map to a Page
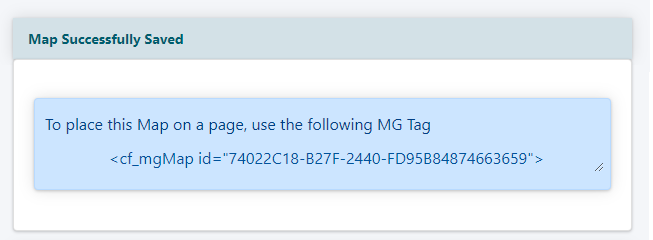
Copy the MG Tag
On the preview page, an example of the map will appear. Under the map, copy the MG tag.
Add Page
The map can be added to a page under Content Pages Add Page
Paste the MG tag into the 'content' box. .
Step 3. Select the Members to Appear on the Map
Manually Choose a Member
The members who will appear on the map and search results must be manually selected. This allows you greater customization options to select only desired members.
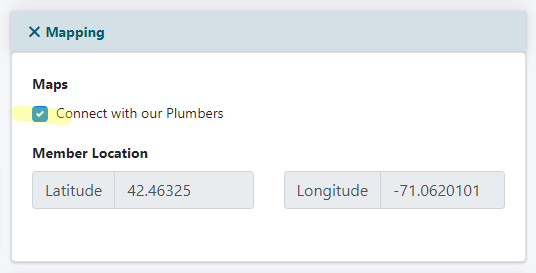
Edit Member Details
A member can be edited under Members Edit Member Details
Select the Member.
Click to expand the Mapping section.
Click to add a check to the box next to the name of the map will add this member's address information to the map.