Tutorial
Add/Edit Custom Script is a great resource if you have a specific script that needs to be added to one or more pages. Instead of adding the script to each of the pages, it is only necessary to add the cf tag in place of the script.
In the future, if the script needs to be edited, it only needs to be edited in one place and the changes will automatically be updated on each instance on the site where the script is running.
It is also easy to disable the script in one place, and the script will no longer show on all of the pages where the script has been placed.
Click on each section to expand it for more information
The Add/Edit Custom Script tool can be found under Tools Add/Edit Custom Script
Choose 'Add New Custom Script' from the drop down menu and click the button.

Custom Script Settings
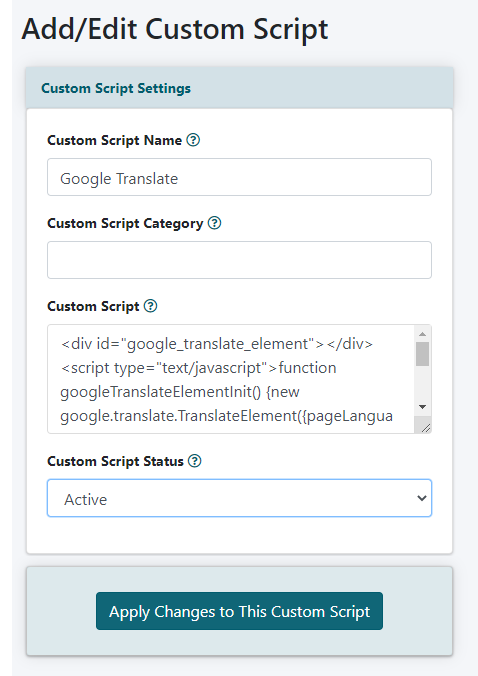
Custom Script Name
Enter a name for the custom script. This name will not be shown anywhere on the live site. It is an identifier so you can find it in the drop down menu and edit it in the future.
Custom Script
Add the Script to the 'Custom Script' field. This code doesn't necessarily only have to be a script, it can also be html code, css code, plain text, etc.
Custom Script Status
Set the status of the custom script to 'active' if this section should be shown on your pages. Set the status to 'inactive' to disable the script from showing on your pages.
Click the button
Add the Custom Script to a Page
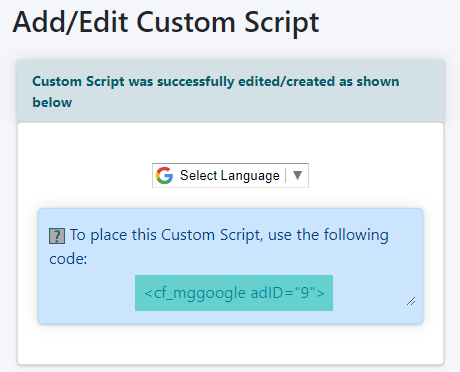
After the custom script has been saved, a preview screen with the script will appear.
The CF Tag will appear in the box below the preview. Copy the cftag and paste it into the content box for a page, department or portal page.