
Tutorial
*These instructions are just for those sites already connected to Authorize.net CIM
MemberGate has been able to further secure Authorize.net CIM which allows your site to qualify for SAQ-A PCI DSS compliance.
In order to implement this, an additional key called a Public Key does have to created within your authorize.net account and added to your MemberGate Payment Gateway settings.
There are only 2 steps to take to complete this update:
- At authorize.net - create the public key
- At your MemberGate site - paste the public key in Payment Gateway
Click on each section to expand for further detail.
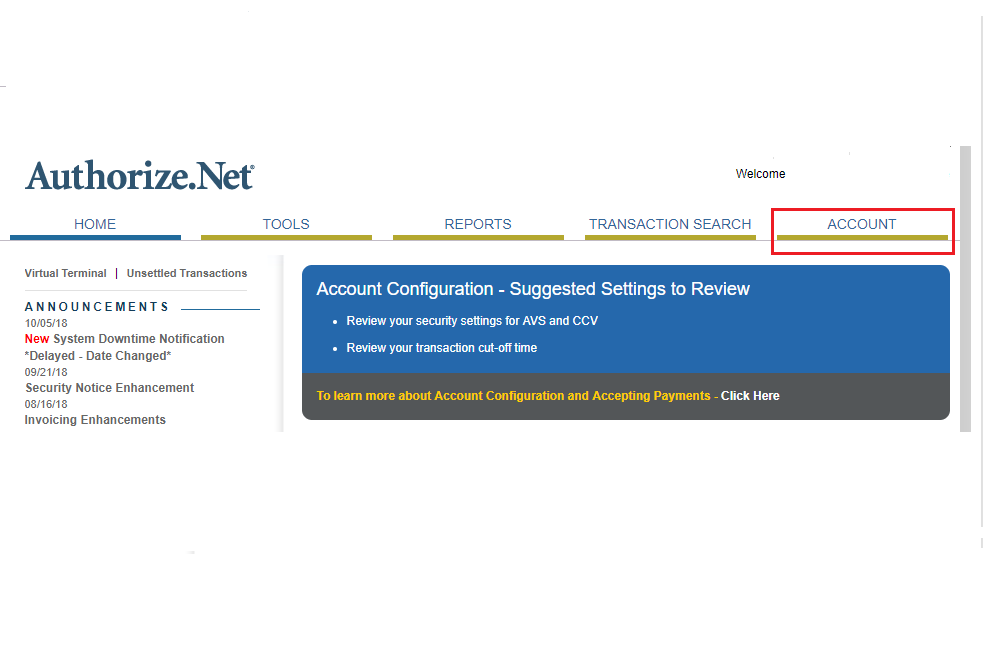
Login to your Authorize.net Account
First, log into your Merchant Interface at https://account.authorize.net.
Create a 'Public Client Key'
- Click on 'Account' in the Top Nav
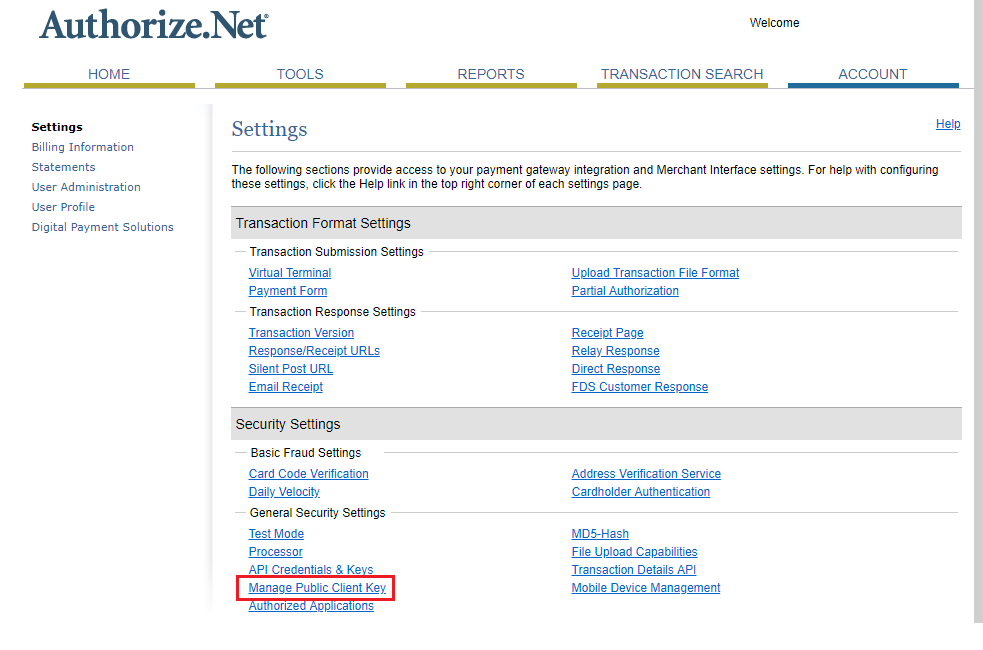
- Under 'Security Settings', click 'Manage Public Client Key'
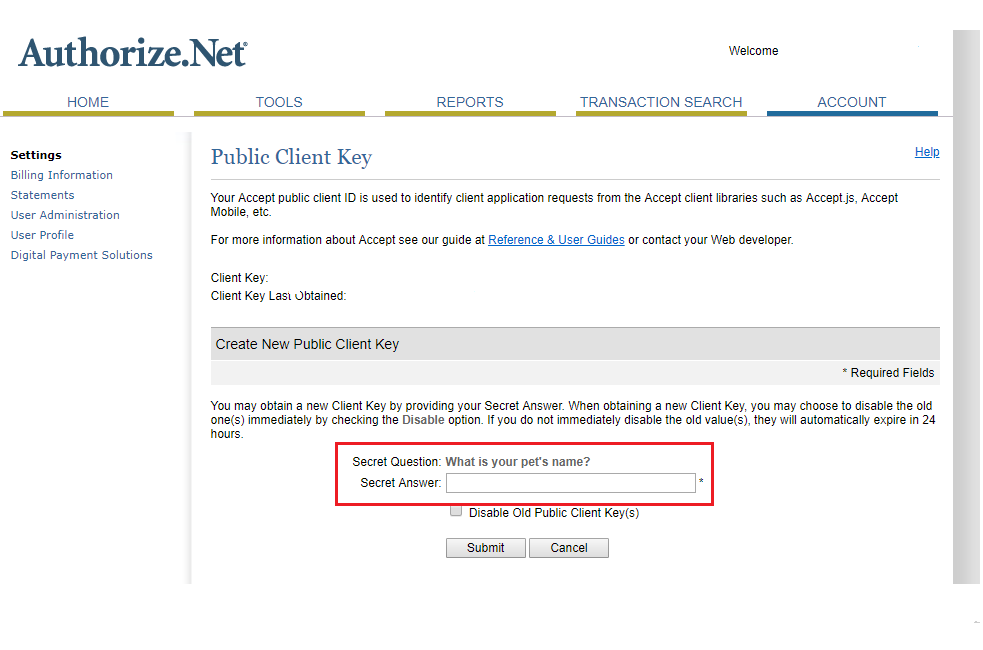
- Under 'Create New Public Client Key' Answer the Question
- Click Submit
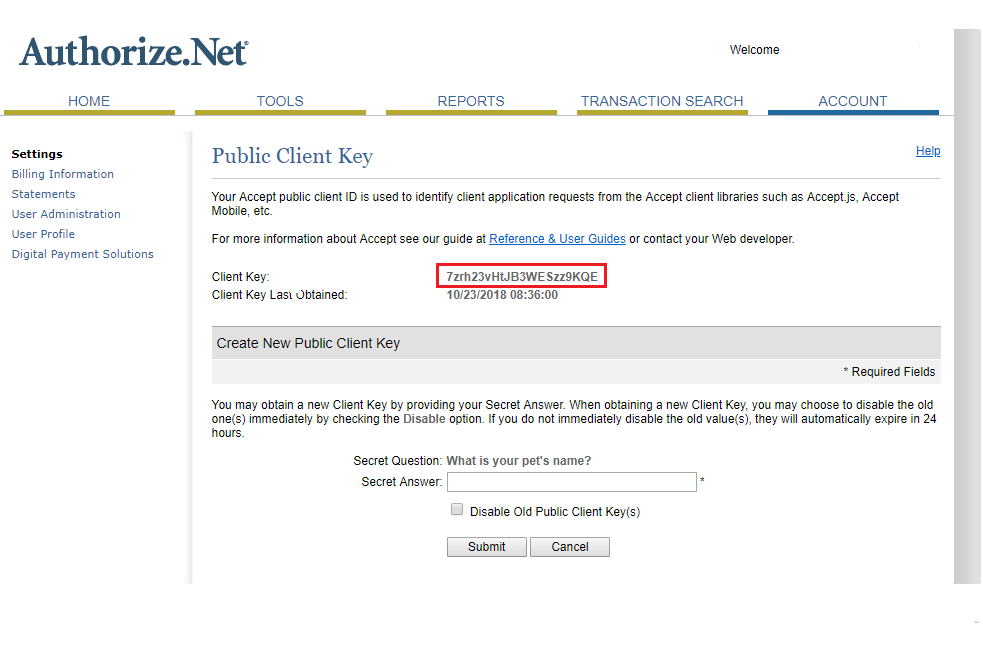
- Copy the 'Client Key'

Login to your MemberGate Site: Update your Payment Gateway Settings
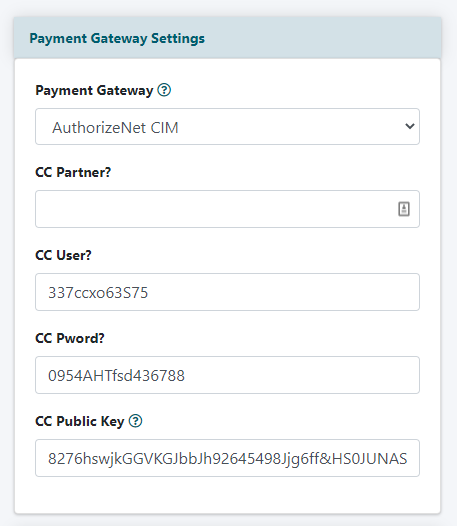
Payment Gateway Settings
The Payment Gateway options are edited on the right side of the control panel under Payment Settings Payment Gateway
CC Public Key
Enter the Public Key that had just been generated.
Save the Changes
When all of the changes have been made, click on the button found at the bottom of the page.
Successful Connection
Confirm that Connection to AuthorizeNet Successful' results.
Related Articles
