Tutorial
Set custom default settings for fields in add content. If you always want your pages to include specific settings, they can now be set ahead of time.
Set up the Content Page Defaults
Follow these steps to set up the custom Content Page Default Values:
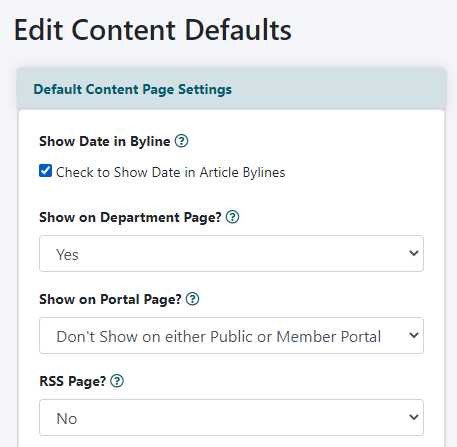
The Page Default Settings can be found under Content Pages Page Defaults
Update each of the fields to the value that you would like to be selected when you choose 'Add Page'. The drop down menu options for each field are the same as in 'Add Page or Edit Page'. When 'Add Page' is selected the values in each of the fields will be the defaulted option showing. It would not be necessary to update those fields on each of your content pages moving forward.
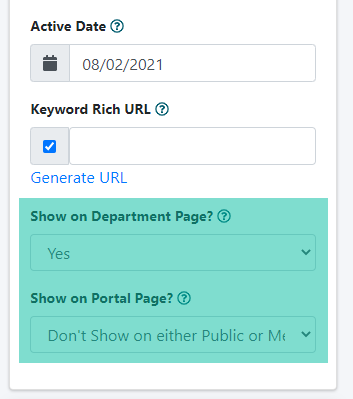
Settings as Seen on Add Page
Press the button to save the changes. Choose 'Add Page' to see the results.
Notes
1. These steps can be repeated at anytime. The new default setting in 'Add Page' would be updated to the new setting that was selected the most recent time.
2. The default content page settings do not impact content pages already created. The default settings will only be seen in 'add page' to help in ease of setting up a new page.
3. Show Left Nav Panel On This Page? and Show Right Nav Panel On This Page? have an option of 'Accept Default'. The default setting can be found or adjusted in the control panel under 'Master Settings' choose 'Edit Master Template'. At the bottom there are options for the default setting for the nav panels on pages.
4. Print Page Options? also has an 'Accept Default' setting. The default setting for the print page options can be found under 'Master Settings' choose 'Edit Master Template' in the Show Printer Friendly Icon? field. The setting in that field is the default.