
Amazon S3 is integrated with MemberGate to allow you to easily access your stored files to deliver them on your MemberGate site.
The files can be streamed directly from the built in media players or can delivered as a download for customers and members.
These files are secure and can be set for Private so they are only accessed from your MemberGate site.
Review all of the tutorials in the tabs below to access your Amazon S3 files on your site.
- Connect Your Amazon S3 Account
- Stream Files in Video Player
- Stream Files in Audio Player
- Offer as Downloadable File
- Sell Download in Shopping Cart
- Secure Amazon S3 Buckets
Connect Your Amazon S3 Account
This is a one time action, but the first step is to connect your MemberGate site to your Amazon S3 account.
From the MemberGate Control Panel
Amazon S3 settings can be connected from the right side of the control panel under API Service Settings Amazon AWS
Login to Your Amazon AWS Console
- Copy your Amazon Access Key and paste it into the field in MemberGate
- Copy the Amazon Secret Key and paste it into the field in MemberGate
- In the 'Amazon File Filters' field, enter the file types that you would like to access from your Amazon S3 account to use on your MembrGate site (for example, mp4, mp3, pdf etc). Separate each different file type with a comma.

Extra Resources: Find your Amazon Access Key and Amazon Secret Key
How to Stream Files using the MemberGate Video Player
Once you have connected your Amazon s3 account to your MemberGate site, you can start creating players and protecting your files with the MemberGate Media Player
Video and Audio files which you have uploaded to your Amazon account, can be embedded on your content, department or portal pages using the MemberGate built-in video player.
The players have a responsive option so it will adjust to the screen size on any desktop, tablet or mobile device.
Your members will be able to view the embedded video directly from your pages.
As MP4 files can be viewed on all devices, MemberGate recommends using MP4 video files and MP3 audio files
(As FLV files are no longer supported by Adobe, we can provide no support !)
To Embed a Video File:
Click on each section to expand for more information:
The Video Players can be found under Multimedia Video Players
Choose 'Add New Video Player' from the drop down menu and click the button.
Video Player
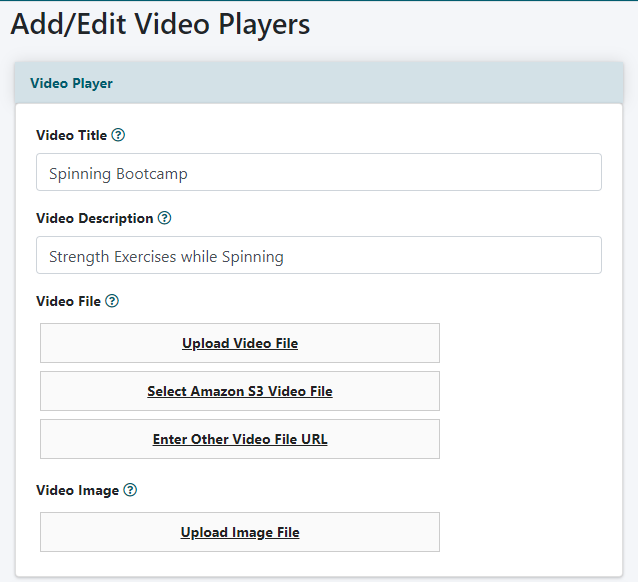
Video Title
Enter a Title for the video
Video Description
Enter a Brief Description for the video
Video File
There are three different ways to select the video file that can be played in this player.
Upload Video Option
If uploading the file directly to the site, click Upload Video File and select the file from your local drive.
Select Amazon S3 Video File
To select the file from your Amazon S3 Account choose the Select Amazon S3 Video File link. Visit the tutorial on using Amazon S3 to upload your files for more instruction if necessary.
Enter Other Video File URL
To use a video hosted at another third party solution, click Enter Other Video URL and enter the full URL of the video in the box. Visit the tutorial on using files hosted from a third party for more instruction if necessary.
Video Image
Click on Upload Image File and select an image from your local drive. This image will appear as the static image for the video player before it begins playing.
For best results, the image dimensions should equal the player dimensions.
Settings
Click on the Settings box to open the section.
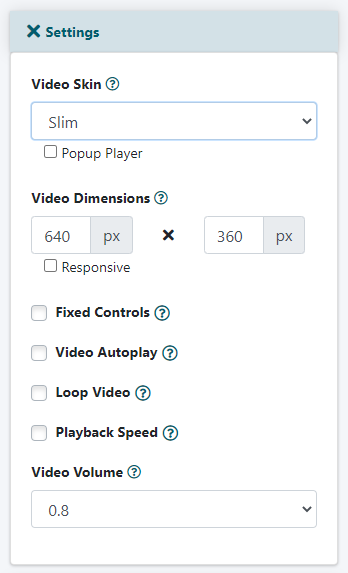
Video Skin
Set the type of Video Skin for the player from the drop down menu. The drop down options are slim, fat or full.
(Optional) Set the Video with Pop Up Ability: First upload an image to the 'Video Image' field (found in the 'Video Player' section) and then click on the Popup Player checkbox in the Video Skin Field.
Video Dimensions
Add a Video Width and Video Height for the video player. This will be the maximum width and height for the player. It will automatically adjust on smaller screen sizes.
Check the box for 'responsive' if you would like the player to always fill the width of the user's full screen.
Fixed Controls
Check the box for 'Fixed Controls' to always display the player's controls. If the 'Fixed Controls' is left unchecked, the bottom controls will only show when the user hovers over the video player.
Video Autoplay
Check the box to set the video so that it automatically begins playing upon loading. Leave the box unchecked when you would like the user to manually click the play button to begin watching.
Loop Video
At the end of the video it will automatically begin playing from the start. If this is the desired behavior, check the 'Loop Video' box.
Playback Speed
Check this box to provide a control for the user to control the speed of the video.
Video Volume
Choose the initial volume setting for the video from the drop down box. The user can manually adjust the volume in the controls if necessary.
Styling
Click on the Styling box to open the section.
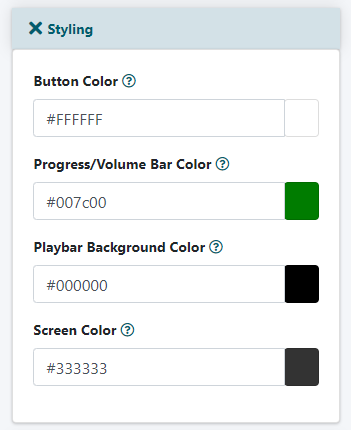
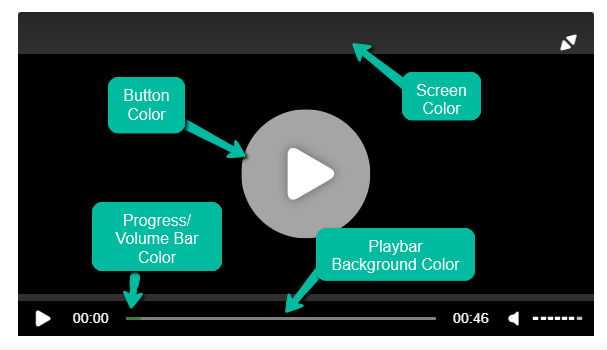
Button Color
Set the Color for the buttons on the control bar. Click in the box and enter the hexadecimal color if known, or click in the color box to choose a color.
Progress/Volume Bar Color
Set the color for the volume and progress bars on the player. Click in the box and enter the hexadecimal color if known, or click in the color box to choose a color.
Playbar Background Color
Set the color for the color behind the volume and progress bars. Click in the first box and enter the hexadecimal color if known, or click in the color box to choose a color.
Screen Color
Set the color for the background of the video. Click in the box and enter the hexadecimal color if known, or click in the color box to choose a color.
Action Events
A script can be input to run after a specific set time.
Click on the Actions box to open the section.
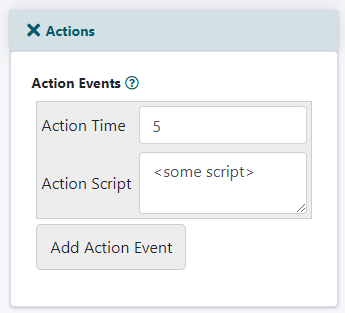
Action Time
Enter the amount of time in seconds. This is the time after the video has been started when the script will run.
Actions Script
Add the script into the actions script box.
Add Additional Scripts
Click on the button and repeat the two steps above.
Click on the button
Add the Video Player to a Page
After the video has been saved, a preview screen with the video will appear.
The CF Tag will appear in the box below the video. Copy the cftag and paste it into the content box for a page, department or portal page.
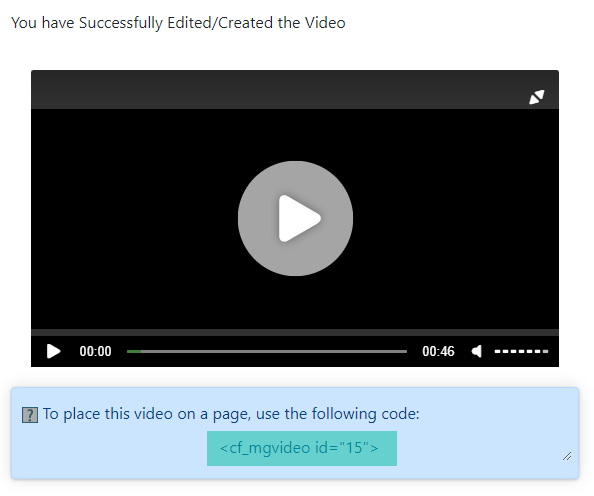
Here is an example of an embedded video player:
How to Stream Files using the MemberGate Audio Player
To use the mp3 files saved at Amazon S3 to stream videos on your site using the built in Audio Player follow these instructions:

Add a New Audio Player
An audio player can be added under Multimedia Audio Player
Audio File
Click on the Select Amazon S3 Audio File option.
Choose the Folder
Your Amazon folders will appear. Click on the folder to find the audio file. If the incorrect folder is chosen click on the to go back to the main directory.

Select the Audio File
Choose the the file (*only files that will work in the audio player will show) to add to the audio player
Save
Click on the button
Replace the Audio File
If an updated audio file needs to replace this file, select a new file using the same steps. The existing file will be overwritten with the new audio file.
Offer a File Stored at Amazon S3 as Downloadable File for your Members
Files can be uploaded to the download area to offer as a benefit to subscribing members. Learn how to add a file using this guide.
Many of the fields in 'Add File' are not mandatory and self explanatory. This tutorial will only take you through the important and most used fields. If there is a field that is not explained here, but you are unsure of how it is used, please open a ticket with our support system. Also remember the quick help question marks next to each field name. Hovering over the question marks will provide a description as well.
*Part 9 provides instruction on selecting the File from your Amazon S3 Account
Click on each section to expand for more information.
Adding a Download File can be found under Downloads Add File
Add Download File
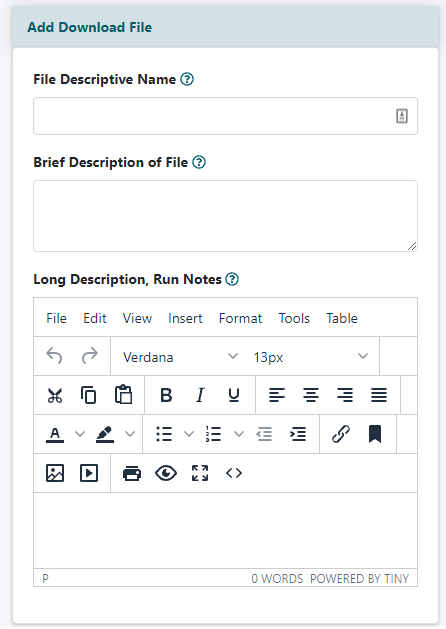
File Descriptive Name
Enter a short (under 30 characters) description of the downloadable file. This will be shown as the descriptive link in the Download Library Area.
Brief Description of File
Enter a longer summary about the file. This will appear on the download page before the user decides to download the file (sort of like a main headline for the page).
Long Description, Run Notes
Enter a longer description of the file. Include any information about the file as necessary. This space can also include instructions on how to download the file.
Download File
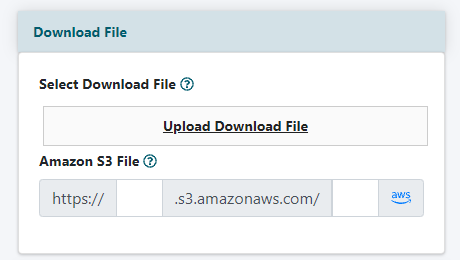
Select Download File
From your local drive- Choose Upload Download File and select the file from your local drive
Amazon S3 File
From your Amazon S3 Account - Enter the bucket and folder information if known, or click AWS to drill down through your files to select it. Please see the tutorial on using Amazon S3 for your downloads for further instruction
Download Images
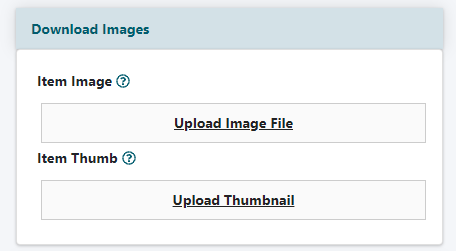
Item Image
Choose Upload Image File to select an image from your local drive. This image will appear on the page with the description of the file.
Item Thumb
Click Upload Thumbnail to select a thumbnail image from your local drive. This will appear in the download library area next to the 'Brief Description of the file' and 'File Descriptive Name'.
Download Settings
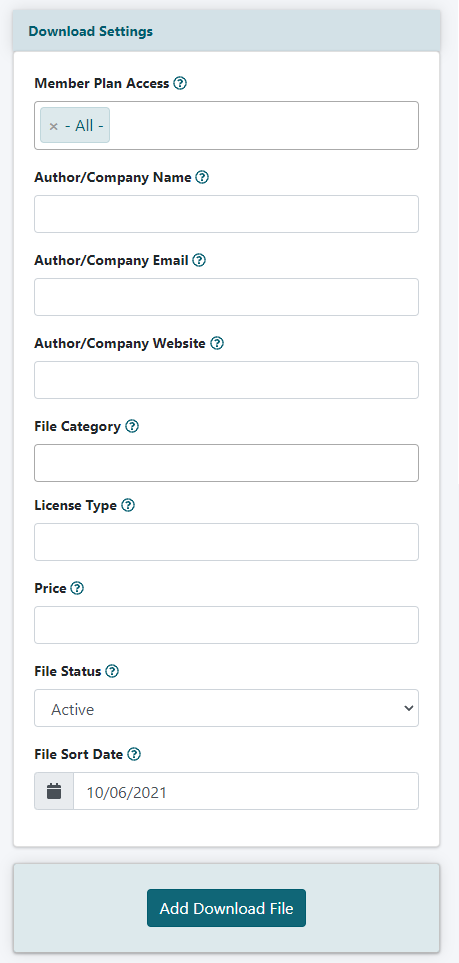
Member Plan Access
The files can be restricted to members belonging to specific member plans. Choose the member plans that do have access to the file. Begin typing in the box to select specific plans.
Author/Company Name
(Optional) Add the author or company who created the download file.
Author/Company Email
(Optional) Add the email address of the author or company who created the download file.
Author/Company Website
(Optional) Add the website of the author or company who created the download file.
File Category
Select which categories to which this file should belong. The categories are created in Settings. Multiple selections can be chosen by holding down the CTRL key on your keyboard.
License Type
(Optional) Enter a license type if appropriate (freeware, shareware, creative commons. etc)
Price
(Optional) Enter a cost that the file might cost outside of this membership website. *This will not be charged in this area. Members can access download files as part of their membership benefits.
File Status
Choose 'active' from the drop down menu to include the download in the download libary. Choose 'inactive' if it is no longer available for download.
File Sort Date
Click in the box to choose a date. The date will help in arranging the download files. The order is set in download Settings.
Click the button found at the bottom
Sell an Amazon S3 Download File in Shopping Cart
A download file or eship delivered product can be sold to customers through the shopping cart option. The download file can be uploaded to the site via the control panel (if small enough), through FTP (if it is large or for ease of uploading multiple files at one time) or can be connected through the Amazon S3 account.
Follow these steps to sell the one time purchase of a download file through the shopping cart:
Click on each section to expand for more information
A product can be set up under Commerce Shopping Cart Add/Edit Products
Enter the product information for the required fields for all products, as well as any other fields that are necessary for this product:
A product can be set up for only electronic delivery, or it can be partial electronic and partial physical delivery
Delivery Options Section
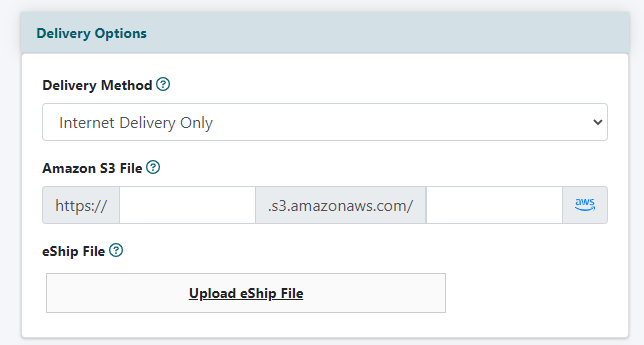
Electronic product only
Delivery Method
If the product for sale is only an electronic product, select 'Internet Delivery Only' from the drop down menu.
New fields will open up underneath the Delivery Method to upload the electronic file.
Amazon S3 File
If an Amazon S3 account is connected, the electronic file can be selected from your Amazon S3 account.
eShip File
An option to upload the file to this site is also available in the eShip File box.
Click Upload eShip File and select the file from a local drive.
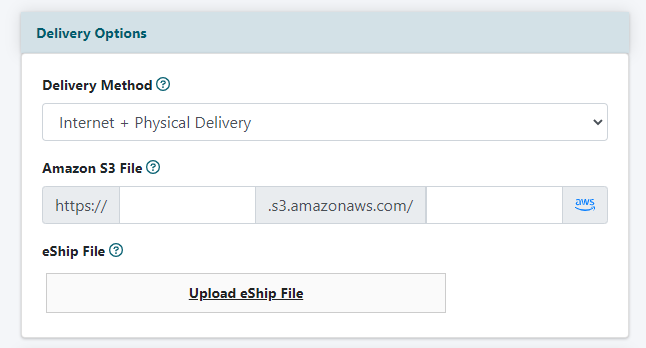
Electronic and physical product
Delivery Method
If the product for sale is both an electronic and physical product, select 'Internet and Physical Delivery' from the drop down menu.
New fields will open up underneath the Delivery Method to upload the electronic file.
Amazon S3 File
If an Amazon S3 account is connected, the electronic file can be selected from your Amazon S3 account.
eShip File
An option to upload the file to this site is also available in the eShip File box.
Click Upload eShip File and select the file from a local drive.
Click the button to add the new download or eship file.
How to Secure Amazon S3 Buckets
If you receive an email from Amazon with the subject line Securing Amazon S3 Buckets, you need to follow the following steps in order to secure your buckets.
- Log in to the Amazon AWS Management Console
- Click on the Bucket named in the email to load the properties and options for that bucket
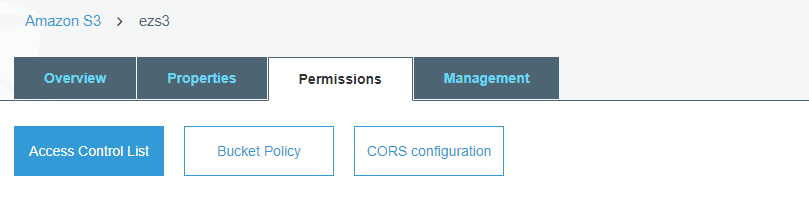
- Select the Permissions tab at the top of the screen, and click on the button for the Access Control List
- Click on the Everyone radio button under the Public Access section
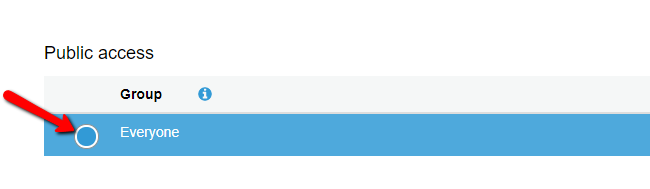
- In the Everyone Access Policy popup which appears on the right hand side of the screen, Uncheck all of the Checkboxes, and click on Save to update the policy

- Repeat the process for any other buckets listed in the email