
Tutorial
How to Add Billing Bolt-Ons
Billing Bolt-Ons allow you to add extra services, access, pricing adjustments, or benefits to a membership without creating a separate Member Plan.
MemberGate includes four types of Billing Bolt-Ons: Supplementary, Recurring, Recurring Discount, and Free. Each type is designed for a different billing or access scenario.
Bolt-Ons can be added to the subscription form so new and renewing members can select them during signup, added and managed through a bolt-on management page or assigned to existing members by an administrator through Edit Member Details.
Members Billing Bolt-Ons
Use the tabs below to choose the type of Bolt-On you would like to create and follow the setup instructions for that option.
The billing bolt-ons can be set up under Members Billing Bolt-Ons
Please review each of the different bolt-on options below for instructions on how to create them.
Supplementary Billing Bolt-On
A supplementary bolt-on allows you to offer an additional paid option to members outside of their standard membership plan. This can be used for extra services, special access, additional resources, or other benefits that are available for a separate fee.
Bolt-On Settings
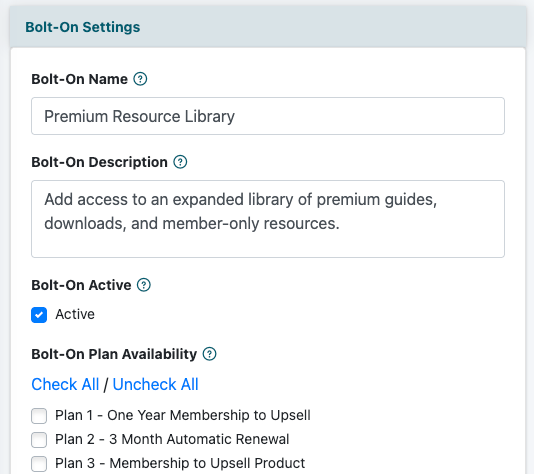
Use the Bolt-On Settings section to name the bolt-on, describe what members will receive, choose whether it is active, and decide which member plans can access it.
Bolt-On Name
Enter a name for the bolt-on in the Bolt-On Name field.
Choose a name that clearly identifies what the bolt-on provides. This name should make sense to you when managing the bolt-on and to members if the name appears during the purchase or subscription process.
Bolt-On Description
Enter a short description in the Bolt-On Description field.
This description should explain what the member will receive when they add the bolt-on. Keep it clear and direct so members understand the extra service, content, access, or benefit being offered.
For example, a supplementary bolt-on description might explain that the member will receive access to an additional resource library, a special service, or a premium content area.
Bolt-On Active
Use the Bolt-On Active setting to control whether the bolt-on is available.
When the bolt-on is active, it can be made available to members. If the bolt-on is inactive, it will not be available for new member selections, but existing members who already have the bolt-on may continue to process according to the bolt-on settings.
Bolt-On Plan Availability
Use Bolt-On Plan Availability to choose which member plans are allowed to access this bolt-on.
Check the member plans that should be able to use the bolt-on. You can use Check All or Uncheck All if you need to quickly update the plan selections.
This setting is helpful when a bolt-on should only be available to certain membership levels or pricing plans.
Bolt-On Definition
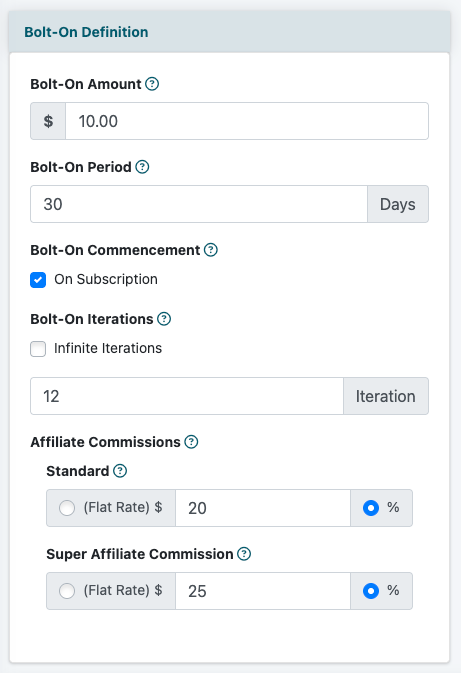
Use the Bolt-On Definition section to set the billing details for the supplementary bolt-on.
Bolt-On Amount
Enter the amount that should be charged for the bolt-on in the Bolt-On Amount field.
This is the fee members will pay for the supplementary bolt-on.
Bolt-On Period
Enter the number of days for the Bolt-On Period.
This determines the period connected to the bolt-on. For a supplementary bolt-on, this can be used to define how long the bolt-on applies before the next billing action or iteration.
Bolt-On Commencement
Use the Bolt-On Commencement setting to choose when billing for the bolt-on should begin.
If On Subscription is selected, the bolt-on billing begins when the member subscribes. If a specific commencement date is needed, use the available date field to choose when billing should begin.
Bolt-On Iterations
Use Bolt-On Iterations to determine how many times the bolt-on should run.
If the bolt-on should be charged for the length of membership, check the box for Infinite Iterations.
Enter the number of iterations if the bolt-on should only run a specific number of times. If the bolt-on should continue without a set ending point, select Infinite Iterations.
Affiliate Commissions
If your site uses an affiliate program, you can configure affiliate commission settings for the bolt-on.
Standard Affiliate Commission
Enter the standard affiliate commission amount, if applicable. The commission can be set as either a flat rate or a percentage.
Super Affiliate Commission
If you use super affiliates, enter a separate super affiliate commission amount, if applicable.
This value can be used to give super affiliates a higher commission rate than standard affiliates.
Bolt-On Access
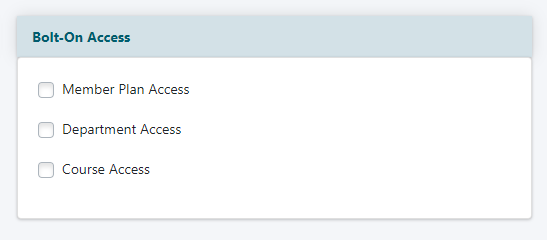
Use the Bolt-On Access section to determine what the member receives when the supplementary bolt-on is added.
Member Plan Access
Select Member Plan Access if the bolt-on should give the member access to one or more member plans.
After enabling this option, choose the member plans that should be included with the bolt-on.
Department Access
Select Department Access if the bolt-on should give the member access to one or more departments.
After enabling this option, choose the departments that should be included with the bolt-on.
Course Access
Select Course Access if the bolt-on should give the member access to one or more courses.
After enabling this option, choose the courses that should be included with the bolt-on.
Optional: Customize Bolt-On Notifications
Bolt-Ons can send notification messages when billing activity occurs. Your site's default Bolt-On Notifications can be used, or you can create custom messages for an individual bolt-on.
Custom notifications can be created for the first charge, recurring charges, and the ending or completion message.
Add the Bolt-On to the Subscription Form
After the supplementary bolt-on has been configured, it can be added to the subscription form so eligible members can select it during signup.
Recurring Billing Bolt-On
A recurring billing bolt-on allows you to add an additional recurring charge or recurring discount to selected member plans. This is useful when you want to offer an optional recurring service, extra access, or added benefits without creating a completely separate member plan.
Bolt-On Settings
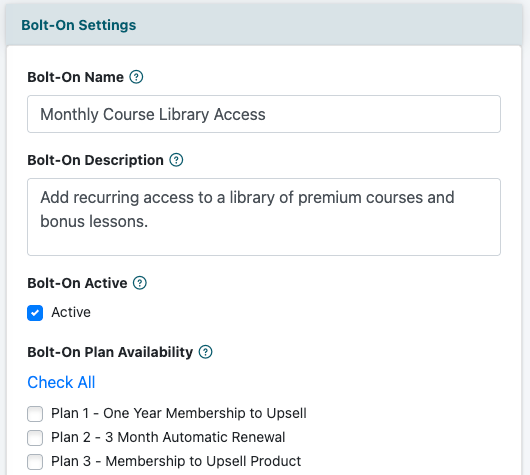
Use the Bolt-On Settings section to name the bolt-on, describe what members will receive, choose whether it is active, and select which member plans can access it.
Bolt-On Name
Enter a name for the bolt-on in the Bolt-On Name field.
Choose a name that clearly identifies the recurring charge, discount, service, or benefit.
Bolt-On Description
Enter a short description in the Bolt-On Description field.
The description should explain what the member receives when the bolt-on is added.
Bolt-On Active
Use the Bolt-On Active setting to control whether the bolt-on is available.
When the bolt-on is active, it can be made available to members. If the bolt-on is inactive, it will not be available to new members, but existing members who already have the bolt-on may continue to process.
Bolt-On Plan Availability
Use Bolt-On Plan Availability to choose which member plans can access this bolt-on.
Check the member plans that should be allowed to use the bolt-on. Use Check All or Uncheck All if you need to quickly update the selections.
Bolt-On Definition
Use the Bolt-On Definition section to set the recurring billing details for the bolt-on.
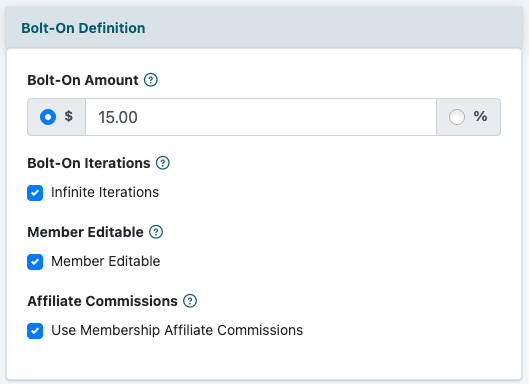
Bolt-On Amount
Enter the amount for the recurring billing bolt-on in the Bolt-On Amount field.
Select whether the amount should be entered as a dollar amount or a percentage.
A dollar amount can be used when the bolt-on should add or adjust billing by a specific amount. A percentage can be used when the bolt-on should be calculated as a percentage of the member plan recurring billing fee.
Bolt-On Iterations
Use Bolt-On Iterations to determine how many times the bolt-on should run.
Select Infinite Iterations if the bolt-on should continue without a set ending point.
If the bolt-on should only run a specific number of times, leave Infinite Iterations unchecked and enter the number of iterations.
Member Editable
Use the Member Editable option to control whether members can manage the bolt-on themselves.
If this option is checked, members can manage the bolt-on, such as removing it when they manage their own subscription.
If this option is not checked, only an admin can remove the bolt-on.
Affiliate Commissions
If your site uses an affiliate program, review the affiliate commission settings for the bolt-on.
Use Membership Affiliate Commissions
Select Use Membership Affiliate Commissions if the bolt-on should follow the affiliate commission settings from the membership.
Custom Affiliate Commissions
If you do not want to use the membership affiliate commission settings, you can enter separate commission values for the bolt-on.
The standard affiliate commission can be set as either a flat rate or a percentage.
Super Affiliate Commission
If your site uses super affiliates, you can enter a separate super affiliate commission amount.
This optional value can be used when super affiliates should receive a different commission rate.
Bolt-On Access
Use the Bolt-On Access section to choose what the member receives when the recurring billing bolt-on is added.
Member Plan Access
Select Member Plan Access if the bolt-on should provide access to one or more member plans.
After enabling this option, choose the member plans that should be included with the bolt-on.
Department Access
Select Department Access if the bolt-on should provide access to one or more departments.
After enabling this option, choose the departments that should be included with the bolt-on.
Course Access
Select Course Access if the bolt-on should provide access to one or more courses.
After enabling this option, choose the courses that should be included with the bolt-on.
Optional: Customize Bolt-On Notifications
Bolt-Ons can send notification messages when billing activity occurs. Your site's default Bolt-On Notifications can be used, or you can create custom messages for an individual bolt-on.
Custom notifications can be created for the first charge, recurring charges, and the ending or completion message.
Add the Bolt-On to the Subscription Form
After the recurring billing bolt-on has been configured, it can be added to the subscription form so eligible members can select it during signup.
Setting Up a Recurring Billing Discount Bolt-On
A recurring billing discount bolt-on allows you to apply an ongoing discount to a member's recurring billing. This can be useful for loyalty discounts, special promotions, partner pricing, grandfathered rates, or other situations where a member should receive a repeated discount without changing their main member plan.
Bolt-On Settings
Use the Bolt-On Settings section to name the discount, describe what it does, choose whether it is active, and select which member plans can use it.
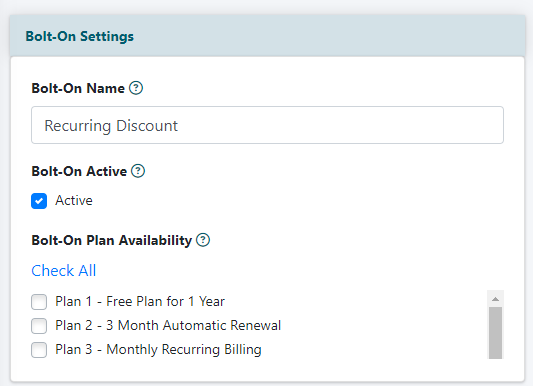
Bolt-On Name
Enter a name for the discount in the Bolt-On Name field.
Choose a name that clearly identifies the discount.
Bolt-On Description
Enter a short description in the Bolt-On Description field.
The description should explain the discount in simple terms.
Bolt-On Active
Use the Bolt-On Active setting to control whether the discount is available.
When the bolt-on is active, it can be used for eligible members. If the bolt-on is inactive, it will not be available for new selections, but existing members who already have the bolt-on may continue to process.
Bolt-On Plan Availability
Use Bolt-On Plan Availability to choose which member plans can use this recurring billing discount.
Check the member plans that should be eligible for the discount. Use Check All or Uncheck All if you need to quickly update the selections.
Bolt-On Definition
Use the Bolt-On Definition section to set the recurring discount details.
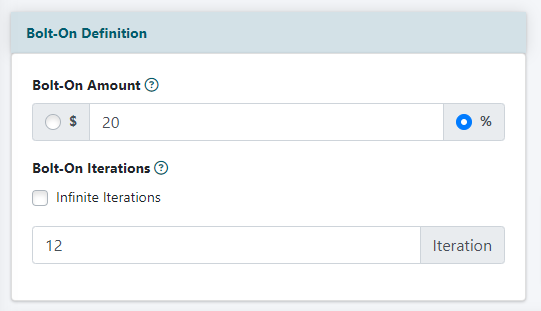
Discount Amount
Enter the amount of the recurring discount in the Bolt-On Amount field.
Select whether the discount should be a dollar amount or a percentage.
Bolt-On Iterations
Use Bolt-On Iterations to determine how many times the discount should be applied.
Select Infinite Iterations if the discount should continue for as long as the member keeps the bolt-on.
If the discount should only apply a specific number of times, leave Infinite Iterations unchecked and enter the number of iterations.
Member Editable
Use the Member Editable option to control whether members can manage the discount themselves.
For most admin-applied discounts, you may want to leave this unchecked so only an admin can remove the discount.
If members should be able to remove the discount themselves when managing their subscription, check Member Editable.
Bolt-On Access
For a recurring billing discount, Bolt-On Access is usually not needed.
Optional: Member Plan Access
Select Member Plan Access only if the discount should also provide access to one or more member plans.
Optional: Department Access
Select Department Access only if the discount should also provide access to one or more departments.
Optional: Course Access
Select Course Access only if the discount should also provide access to one or more courses.
Optional: Customize Bolt-On Notifications
Bolt-Ons can send notification messages when billing activity occurs. Your site's default Bolt-On Notifications can be used, or you can create custom messages for an individual bolt-on.
Custom notifications can be created for the first charge, recurring charges, and the ending or completion message.
Save the Bolt-On
After all settings have been completed, click Add Bolt-On to save the recurring billing discount.
Before saving, review the discount name, description, active status, plan availability, discount amount, iterations, member edit setting, and access options.
Setting Up a Free Bolt-On
A free bolt-on allows you to give members additional access without adding a charge to their recurring billing. This can be useful for special promotions, bonus content, complimentary course access, member rewards, or admin-added access that should not affect the member's billing amount.
Bolt-On Settings
Use the Bolt-On Settings section to name the free bolt-on, describe what it provides, choose whether it is active, and select which member plans can use it.
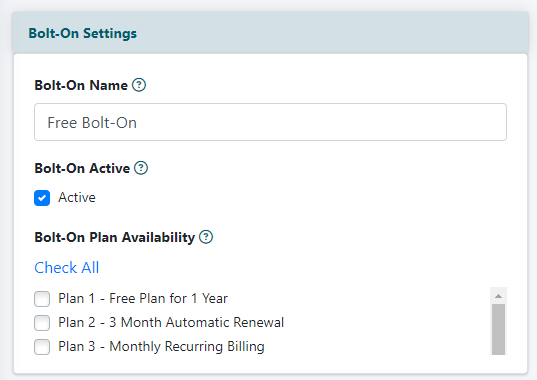
Bolt-On Name
Enter a name for the free bolt-on in the Bolt-On Name field.
Choose a name that clearly identifies the access or benefit being provided.
Bolt-On Description
Enter a short description in the Bolt-On Description field.
The description should explain what the member receives when the free bolt-on is added.
Bolt-On Active
Use the Bolt-On Active setting to control whether the free bolt-on is available.
When the bolt-on is active, it can be used by eligible members. If the bolt-on is inactive, it will not be available for new selections, but existing members who already have the bolt-on may continue to process.
Bolt-On Plan Availability
Use Bolt-On Plan Availability to choose which member plans can use this free bolt-on.
Check the member plans that should be eligible. Use Check All or Uncheck All if you need to quickly update the selections.
Bolt-On Access
Use the Bolt-On Access section to choose what the member receives when the free bolt-on is added.
Member Plan Access
Select Member Plan Access if the free bolt-on should provide access to one or more member plans.
After enabling this option, choose the member plan or plans that should be included.
Department Access
Select Department Access if the free bolt-on should provide access to one or more departments.
After enabling this option, choose the department or departments that should be included.
Course Access
Select Course Access if the free bolt-on should provide access to one or more courses in the LMS.
After enabling this option, choose the course or courses that should be included.
Optional: Customize the Bolt-On Notification
A Free Bolt-On can send a notification when the bolt-on commences. Your site's default Bolt-On Notification can be used, or you can create a custom message specifically for this bolt-on.
Save the Bolt-On
After all settings have been completed, click Add Bolt-On to save the free bolt-on.
Before saving, review the bolt-on name, description, active status, plan availability, and access selections to make sure the free bolt-on is configured correctly.