Setting up a built-in tag in Google Tag Manager involves a few steps.
Take these steps to setup the Google Analytics Universal Analytics tag.
- Access Google Tag Manager Dashboard
Log in to your Google Tag Manager account and select the container for the website where you want to set up the tag. - Navigate to Tags Section
From the sidebar menu, click on "Tags" to access the Tags section of Google Tag Manager.

- Create a New Tag
Click on the "New" button to create a new tag. Choose the tag type relevant to your built-in tag. In this case, it's "Google Analytics: Universal Analytics".
- Configure Tag Settings
You'll be presented with various settings specific to the chosen tag type. For Google Analytics, you'll need to enter your Google Analytics Tracking ID. You can also configure other settings such as tracking type, cookie settings, and more, depending on your requirements. - Define Trigger
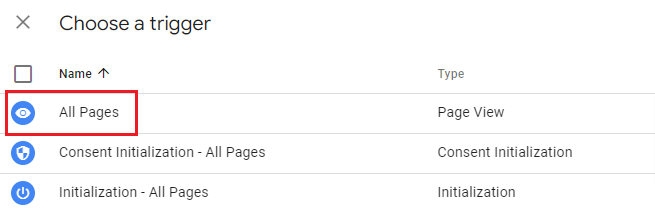
After configuring the tag settings, you need to define when the tag should fire. This is done by setting up a trigger. Click on the "Triggering" section within the tag configuration, then click on the "+" button to add a new trigger. You can choose from predefined triggers or create custom triggers based on specific events or conditions.
- Save the Tag
Once you've configured the tag and associated trigger(s), click on the "Save" button to save your changes. - Preview and Debug
Before publishing the changes live, it's a good practice to preview and debug your tag configuration to ensure it works as expected. You can do this by entering Preview mode in Google Tag Manager and testing the tag on your website. - Publish the Container
After confirming that everything works correctly in the preview mode, you can publish the container to make the changes live on your website. - Verify Tag Implementation
After publishing, it's essential to verify that the tag is working correctly. You can do this by using browser developer tools or by checking the real-time reports in Google Analytics to see if data is being collected as expected.


By following these steps, you can set up any built-in tag in Google Tag Manager, whether it's for Google Analytics, Facebook Pixel, Google Ads, or any other supported integration. Each built-in tag may have specific settings and configurations tailored to its functionality, but the general process remains similar.