Tutorial
Since MemberGate supports Google Tag Manager, adding the tag manager code is a breeze.
To prevent any errors in Google, there are three steps to take to install Google Tag Manager on MemberGate:
- Create the Container in Google Tag Manager
- Publish the Container in Google Tag Manager
- Install the Google Tag in MemberGate
- Begin Setting Up Marketing Tags in Google Tag Manager
Click on each tab for more information.
Create a Container in Google Tag Manager
To help with an error-free installation of Google Tag Manager, the first step is to create a container.
Visit the Google Tag Manager Help and Instructions page for detailed steps.
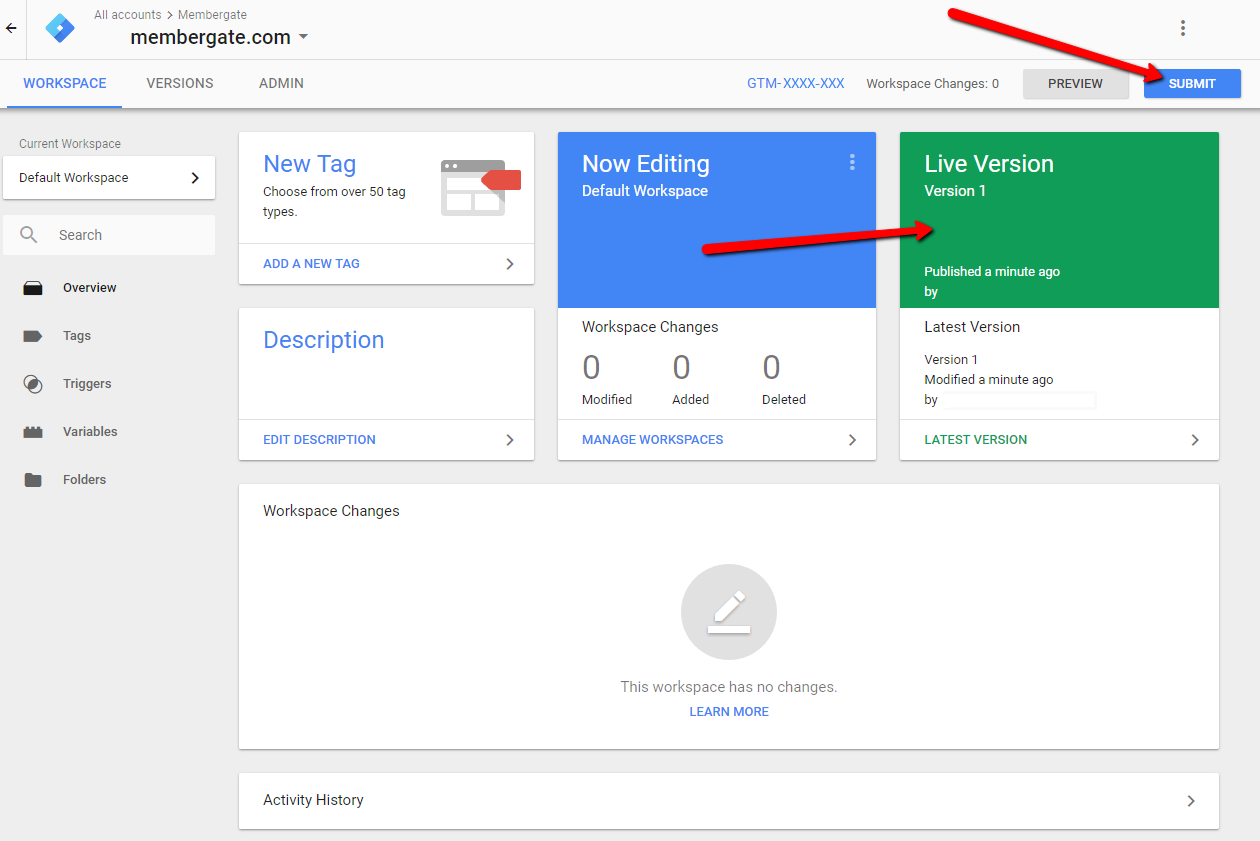
Publish the Container in Google Tag Manager
The next step is to publish the container in Google Tag Manager - even if it is empty.
If the container is not published, it can create a '404 not found error' in Google.
Connect the Google Tag Manager to MemberGate
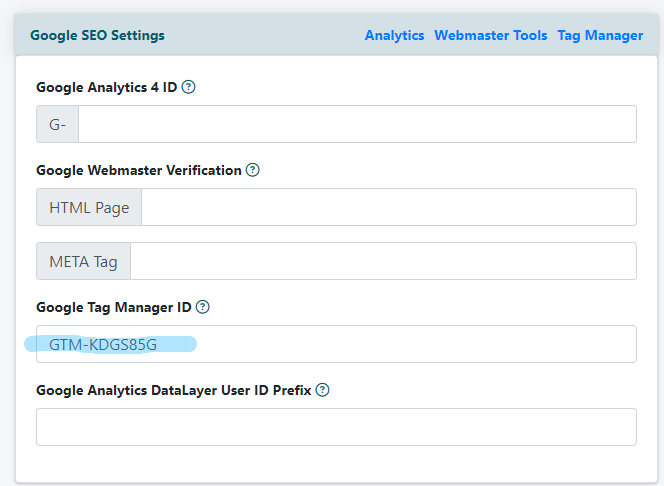
Copy your Google Tag Manager ID from your Google Account
From Your MemberGate Site
The Google Tag Manager can be found under Google/SEO Google Analytics
Google Tag Manager ID
Paste the ID into the 'Google Tag Manager ID' box
Save
Click on the button
The software will automatically add the relevant Google Tag Manager code into the head and body section of your pages.
Note
If you are receiving a 404 Not Found Error, visit part 2: Publish the Container to double check that the container is published (even if it is empty).
Begin Setting up Marketing in Google Tag Manager
Once the error free connection is made, you can begin setting up the marketing tags within Google Tag Manager.