
Tutorial
MemberGate and Stripe can be connected in three easy steps.
Please follow the instructions found in each of the tabs to complete the setup:
- Connect Stripe to MemberGate
- Enable SmartCards with Stripe
- Make sure you are using a subscription form with the Subscription Form Generator
Please click on each tab for more information.
Connect Stripe to MemberGate
In order to connect Stripe to MemberGate, it will be necessary to first obtain the Secret Key and Publishable Key from Stripe.
To connect Stripe to MemberGate:
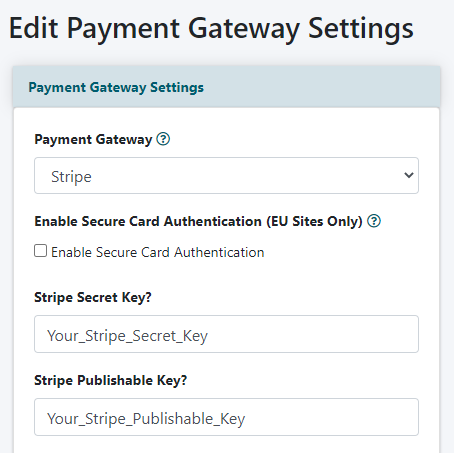
1.The Stripe connection can be made on the right nav under Payment Settings Payment Gateway
2. Select 'Stripe' from the drop down list for payment gateway
3. Enter the 'publishable key' and 'secret key' in their appropriate fields
NOTE: Stripe will only work with a subscription form using the 'Subscription Form Generator'
Please see the Subscription Form Generator tab for instructions
Enable Smarter Cards
The Stripe Payment Gateway service is now directly connected to your member's credit card company. With Stripe's Smarter saved cards functionality, the Stripe system automatically receives updated card information without any action required by your customers.
What this means for you is that even if your member's credit card is due to expire, any recurring billing renewals will still be successfully processed since Stripe will have the updated card information.
There are some steps for you to take in your Stripe account so that the updated credit card information is also reflected in your member's account on your site.
Follow these steps to set up a webhook with Stripe so your member's credit card details will automatically be updated on your MemberGate site:
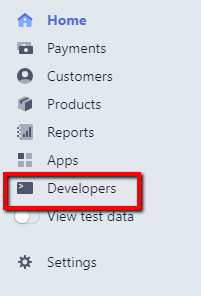
1. Login to your Stripe Account. From the left menu choose 'Developers'
2. Click on 'Webhooks' in the Expanded Menu under 'Developers'

3. Click the 'Add Endpoint' button from the Top Right to Create the New Webhook

4. Set the Endpoint URL, Version and Events to Send:
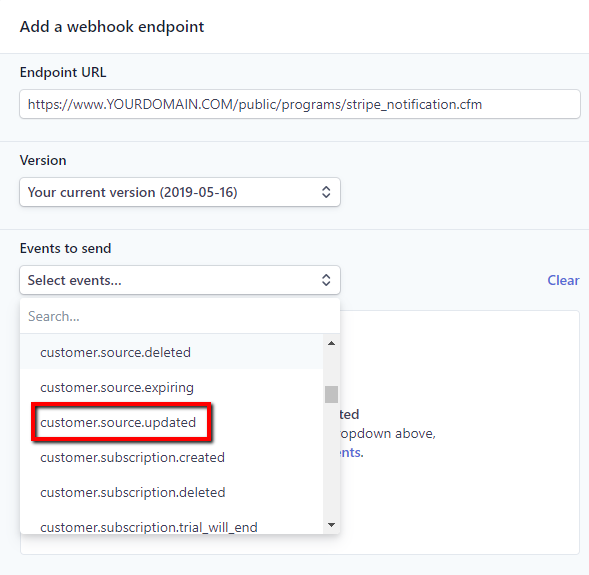
Endpoint URL:
https://www.YOURDOMAIN.COM/public/programs/stripe_notification.cfm
Version: Your Current Version
Events to Send: Choose 'customer_source_updated' from the drop down menu
Click the button to add the webhook. You may be prompted to add your password to authenticate.
Setup the Subscription Form
Setting up the member plan creates the plan and specs for the plan internally. The second step requires the member plan(s) to be added to a subscription form.
All member plans can be added to one subscription form, or one member plan can be added to it's own subscription form. This allows you the flexibility to present your member plans to your customers whichever way is best for your marketing plans.
Subscription forms can be created using the 'Subscription Form Generator'
Click on each to expand for further information about each field of the Subscription Form Generator.
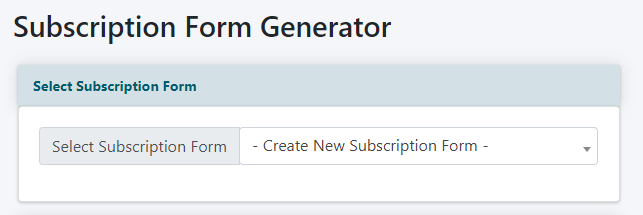
The Subscription Form Generator can be found under Tools Subscription Forms
From the drop down menu choose '- Create New Subscription Form -'
Subscription Form Settings
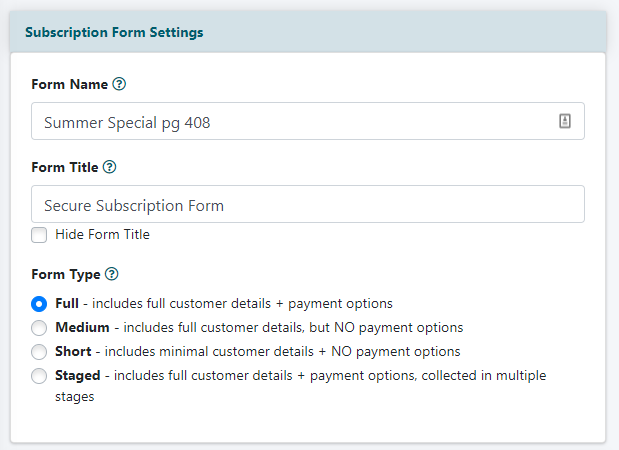
Form Name
Enter a descriptive name for the form. The name is for internal purposes only and does not appear on the subscription form.
Helpful Hint: We do highly suggest adding the content page number of the subscription form to the name of the form. This will help to easily find the form when changes are necessary. An example form name might be 'Main Subscription Form: pg 678'
Form Title
Enter a Title for the form. This will appear as the top header of the form.
Form Type
Click the radio button next to the type of subscription form. An explanation of the three options:
Full
Used for All Member Plans that have a fee. This form will include an area for the credit card information as well as billing address.
Medium
Used for free member plans, but will include fields that collect address information. Credit card information will not be collected with this form.
Short
Used for free member plans, and collects minimal information from the subscriber. This form does not collect address information or credit card information.
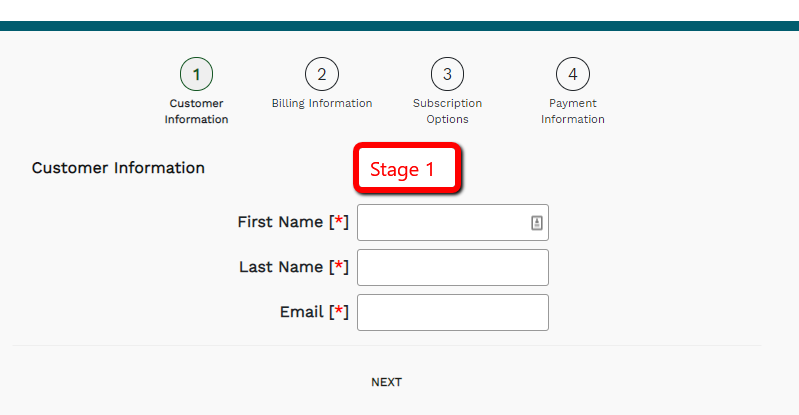
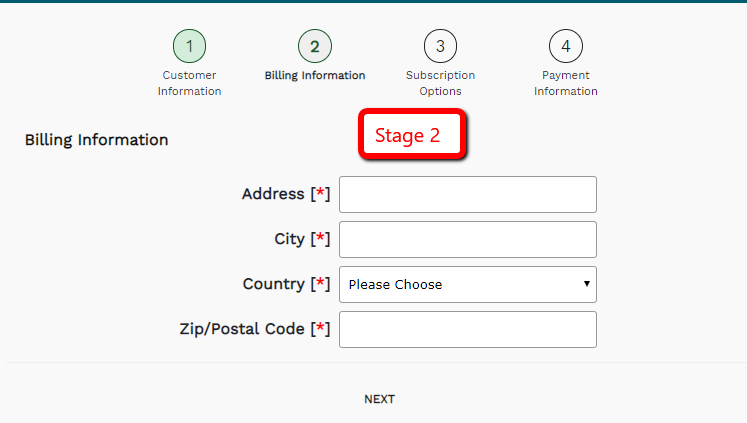
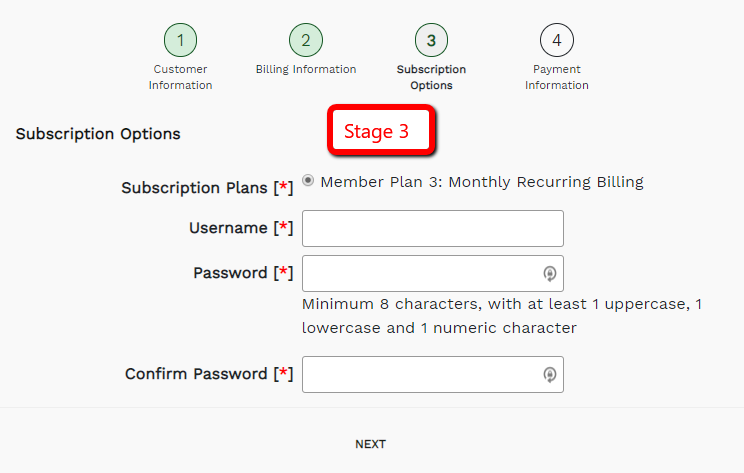
Staged
Used to create a form in smaller chunks, and collects a fee from the subscriber. This form does collect address information or credit card information, but in 4 stages. A user will enter in a small amount of details prior to moving to the next stage.
Form Sections
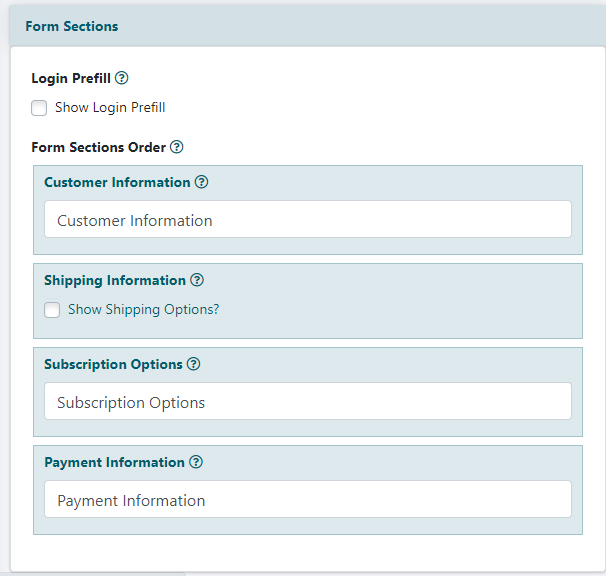
Login Prefill
Click to fill the radio button to include the Login Prefill option. The Login Prefill box allows the user to enter in their username and password to pre-filled the subscription form with all their member data. *Not available on a Staged Subscription Form
Form Sections Order
The order that the sections appear on a subscription form can be arranged to meet your needs. Edit any of the text to customize. Each is the heading of the section found on the live subscription form.
Click the section name and drag and drop it in the listing to rearrange the order of the sections. The sections on the live order form will be a reflection of this arrangement.
The 'Shipping Information' can be disabled. Click to remove the check in the box next to 'Show Shipping Options'. No check means the shipping address section will not appear on the live form, a checked box means the Shipping options will appear.
*Medium Form does not include Payment Information section, and Short Form does not include Payment Information or Shipping Information sections.
Member Plans Options
Use this section to select the member plan options available on this subscription form. There are three steps in setting up the member plans.
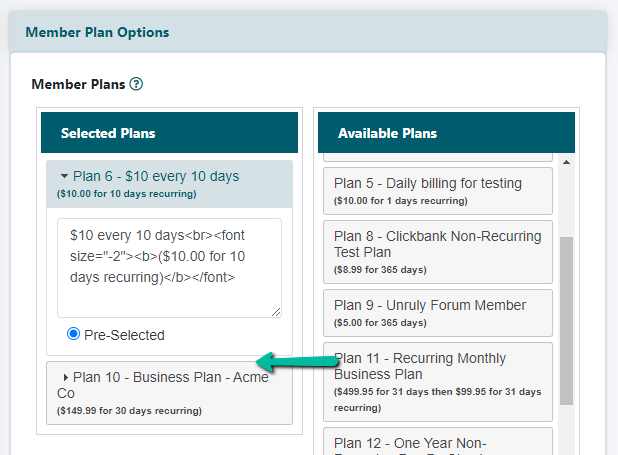
1. Select the Member Plan
Click the desired member plan from the 'Available Plans' listing, drag it and drop it into the 'Selected Plans' box. If using the full or staged form, only select paying member plans. If using the medium or short forms only select free member plans.
The order of the member plans in the Selected Plans box will be the same order they appear on the live subscription form. Click a member plan box to drag and drop it into a desired spot.
2. Enter the Description of the Plan
Click the box of the member plan in Selected Plans to open it. A new box will appear to enter the description of the plan.
Type in the description of each member plan that will appear on the subscription form. This is the text that the user will see before selecting which member plan they would like to sign up for. This area might include information about recurring or non-recurring fees as well as price of the plan and cancellation policy.
3. Choose a Preselected Plan
One plan can be automatically selected on the live form.
Click to fill the 'Pre-Selected' button to choose which plan should be selected by default on the live subscription form.
Hide Member Plans
When only one plan is being used on a form, it can be hidden so it doesn't appear on the form.
Click to fill the button next to 'Hide Member Plans'.
Staged List Server
When using a staged subscription form, the customer's email address can be sent to your email marketing list after completing one or multiple stages.
If set up to collect email addresses, when the customer clicks on the 'next' button, their name and email address will be sent to your email marketing list. This will be sent even if the user abandons the form prior to filling out the whole form.
1) From the 'Staged List Server' field, select the stage that you would like a user to have their email address added to your email marketing list and a drop down box will appear.
A) Click on the tab which includes the name of your email marketing company.
B) Select the List Name from the drop down box, and add any tags.
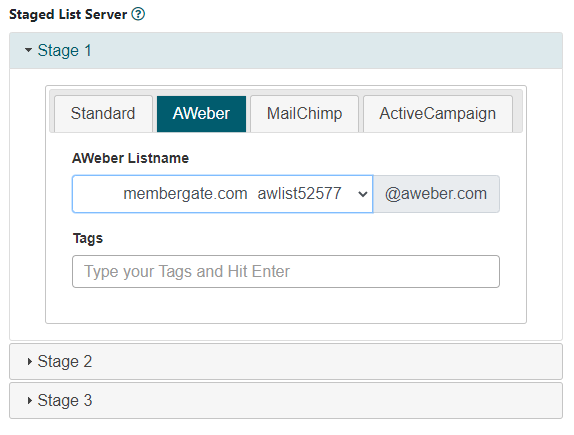
2) Repeat step 1 for all of the stages that you would like an email address added to your email marketing list.
Form Buttons
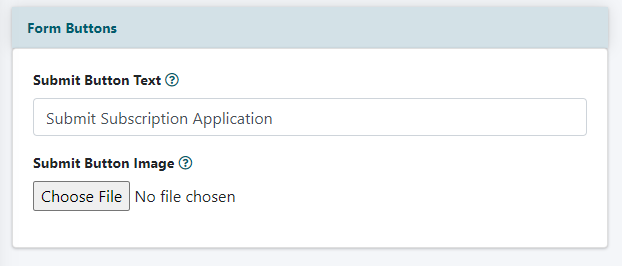
Submit Button Text
If using the automatically styled button, enter the text that will show on the button at the bottom of the form. This is the button the user will click in order to process the form.
Submit Button Image
This is an optional field that allows you to upload a custom image to use as the submit button. This is the image the user will click in order to process the form.
Click on the button to select the desired image from your local drive.
Form Fields
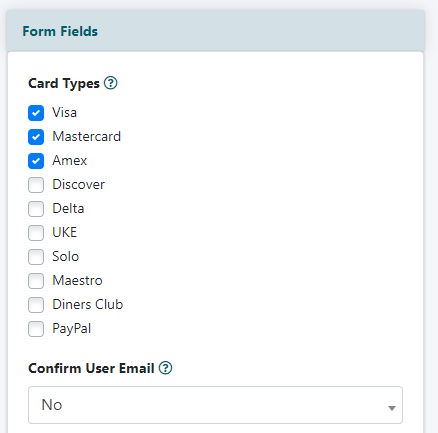
Card Types
Click the boxes next to each card type that can be accepted on the subscription form (only available on Full or Staged Forms).
The type of cards that can be accepted are determined through your payment gateway account.
*Don't forget to choose PayPal if you have integrated your account with that service as well.
Confirm User Email
To prevent misspellings of an email address, an extra email address field can be added to the subscription form. The user will have to input their email address again, and the software will check that both of the email fields match.
To include a second email address field, select 'Yes' from the drop down menu
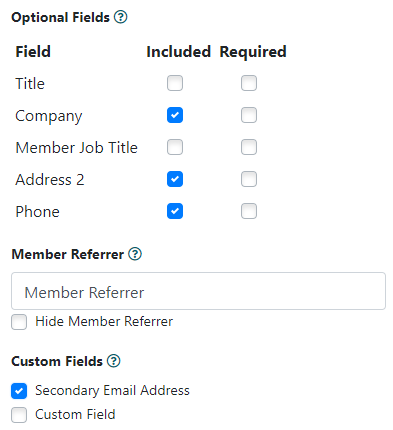
Optional Fields
Extra fields can be selected to include on your form.
Check the boxes next to each optional field to include (and/or require) on this subscription form.
Member Referrer
Uncheck the 'Hide Member Referrer' box to show the member referrer field on the subscription form. A user can enter in the name or username of a member to earn bonus days if available.
Custom Fields
Check the box for each custom field that should show on this subscription form.
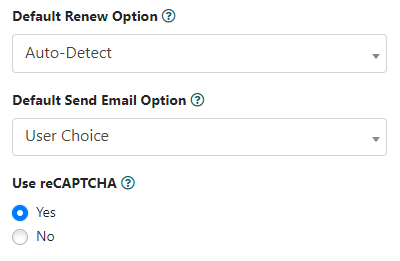
Default Renew Option
Click on the drop down box to choose the renewal option shown on the subscription form. An explanation of the four options:
Auto-Detect
The software will determine if the user filling out the form is existing or new. The 'Is this a Renewal' field will not appear on the form.
User Choice
The user can choose 'yes' for a renewal, or 'no' if they are a new subscriber. The 'Is this a Renewal' field will appear on the form.
Yes
The default value will be 'yes'. Use this option on forms that are not for newly subscribing members. The 'Is this a Renewal' field will not appear on the form.
No
The default value will be 'no'. Use this option on forms that are only for new subscribers and for subscription forms that are not for renewing members. The 'Is this a Renewal' field will not appear on the form.
Default Send Email Option
Click on the drop down box to choose the options for sending email permission shown on the subscription form. An explanation of the three options:
User Choice
The 'Send Email' field will appear on the form. A user can manually select 'yes' for permission or 'no' to decline email.
Yes
The default value will be 'yes'. Use this option for members who have to be on the send email list The 'Send Email' field will not appear on the form.
No
The default value will be 'no'. Use this option for members who cannot be on the send email list. The 'Send Email' field will not appear on the form.
Use ReCaptcha
Click the 'yes' radio button to use ReCaptcha on the form. Click no to not use the ReCaptcha.
Form Text/Messages
The fields in this section are for customization of the messages found on the subscription form.
The majority of these can be hidden from showing on the form. Click on the appropriate 'Hide' box and that message will not appear on the form. Uncheck the box for the message to show on the form. The text box will appear so that it can be edited.
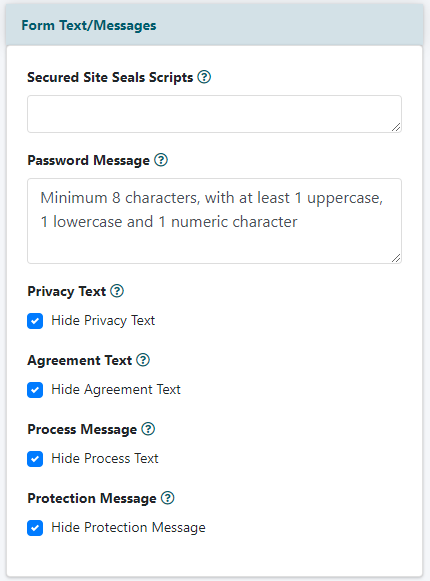
Secured Site Seals Scripts
Code for secure seals like authorize.net, verisign, geotrust etc, can be entered in this box.
Password Message
This box includes the rules the users have to use to meet the password requirements.
Privacy Text
Information that will be on the subscription form about the privacy rules of your site. There is usually a link to the Privacy Statement on your site (generally content page 9).
Agreement Text
The terms of use the user will agree to before submitting the form. There is a checkbox next to this information that the user will have to check before a successful submission.
Process Message
This message will appear underneath the subscription form.
Protection Message
This is the message about the protection on the site to monitor suspicious activity.
Form Styling
The look and feel options for the form. The hexadecimal colors can be chosen from the 'Appearance' section of the control panel.
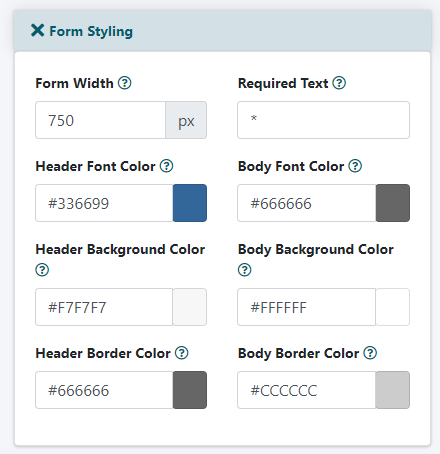
Form Width
Choose how wide the form will be on your page. The form will be responsive, so will shrink or grow depending on the screen size. This width is the widest the form will show on screens larger than the set width.
Required Text
Enter in the text that will go next to fields where the information is required. For example, it might just be an asterisk or the word 'required'
Header Font Color
The font color for things like Customer Information or Payment Information.
Header Font Color
The terms of use the user will agree to before submitting the form. There is a checkbox next to this information that the user will have to check before a successful submission.
Header Background Color
The color of the box around things like Customer Information or Payment Information.
Header Border Color
The color of the border around things like Customer Information or Payment Information.
Body Font Color
The color of the font inside the form like First Name, Credit Card type etc.
Body Background Color
The color of the boxes around things like First Name, Credit Card type etc.
Body Border Color
The color of the border around things like First Name, Credit Card type etc.
Save the Form
To save the settings of this form, click on the button.
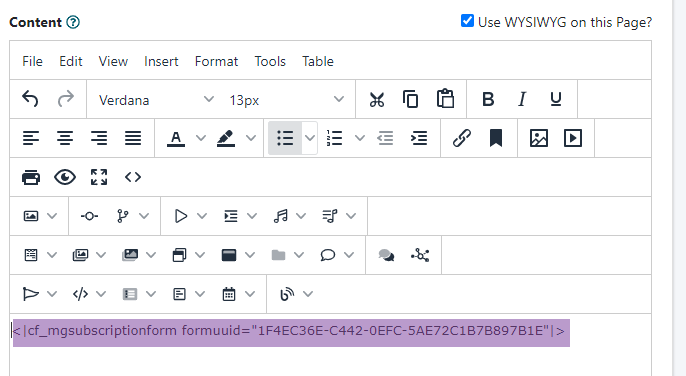
Add the Form to a Content Page
Copy the CF Tag
When the form has been saved, the software will provide a blue box with the code to embed the form at the top of the 'Subscription Form Generator' page. Copy this CF code.

Paste CF Tag onto a Content Page
Open a content page and paste the code in the 'Content' box of the content page where you would like the form to show.
Preview Form and Copy to New
Once a form is saved, the ability to preview the form (it will show on your screen without having to add it to a content page and copy this form to a new one will be available at the top of the page.
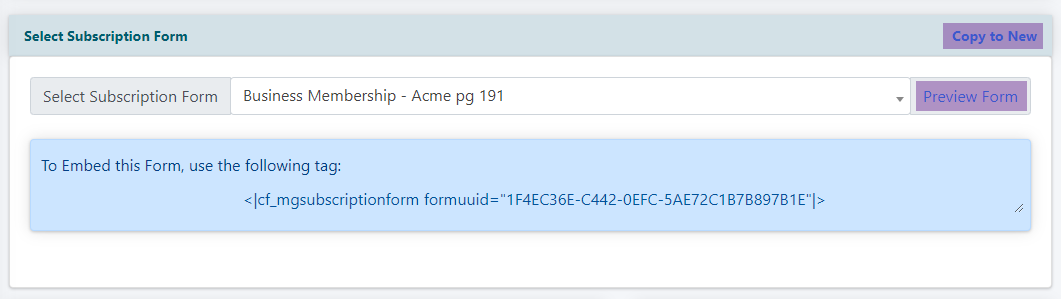
Preview
The button will appear next to the name of the subscription form. Click on the button for a sample of the form to appear on your page.
Copy To New
Click on the 'Copy to New' function to create a brand new subscription form that duplicates all of the settings of the selected form. This is great for you to easily create a replica with your settings, then you can update a couple of the fields to create this new form.