Tutorial
The social bookmark feature allows visitors to your site help to spread the word about what great content your site has to offer.
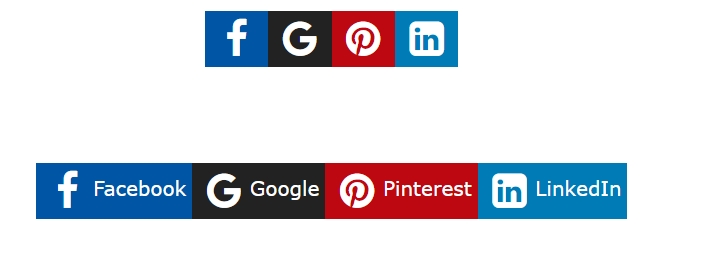
These tags can easily be added to a page on your site. One click and visitors are posting your content to one of the popular social bookmark services so others can find out about it. Below are some various looks for your bookmarks.

While MemberGate comes preloaded with the most popular social networking bookmarks, you can easily add your favorites as well through the social bookmark control panel.
Adding the Social Bookmarks to a Page
The Social Media Sharing Icons can be managed under Social Networking Social Bookmarks
Familiarizing Yourself with the Social Media Bookmarks Edit Page
There are three sections of the Social Bookmarks Page:
- The social bookmarks section shows the social bookmarks that are set up for your site and allows you to update the bookmarks to include others
- The social bookmarks attributes allows you to customize the look and feel of how the social bookmarks will appear on your page.
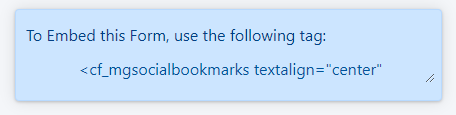
- The embed code section provides a preview of what your social bookmarks will look like with the current settings. It also provides the CF tag to place on your pages to add the social bookmark to your pages.
Social Bookmarks
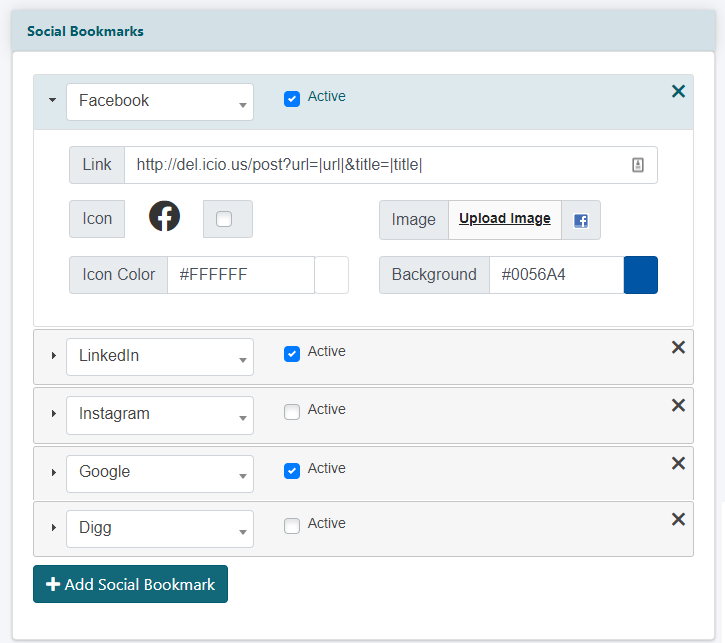
Collapsed Settings
The settings for each bookmark are inside the collapsed bookmark section.
Clicking on the section will open the bookmark
Link
Special URL format - this is the URL associated with the social media bookmark that will be used by the social media site to add the page to a post. The URL link format is created at the social media company.
Icon
The icon is a font awesome icon of the social media site. Check the box next to the icon if it should be displayed on your pages using the icon.
Image
Click Upload Image and choose an image from a local drive. This is used when a custom image is preferred (as opposed to using the font awesome icon)
Icon Color
Enter a hexadecimal color, or click in the box and choose a color from the color picker for the color of the font of the font awesome icon.
Background
Enter a hexadecimal color, or click in the box and choose a color from the color picker for the color of the background of the font awesome icon.
Active
Check the active box to include this social media option when adding the social bookmarks on your pages.
Organization
The order that the social bookmarks will be arranged in can be updated by clicking on the bookmark and dragging it to another spot in the list. The top bookmark will appear on the left or top of the social bookmarks.
Add a New Bookmark
Click the button to add a new social bookmark option. Choose the bookmark from the 'Select Bookmark' drop down menu
Edit the Social Bookmarks Attributes
The social bookmark attributes can be adjusted for each of your pages. This allows you the flexibility to have a different look for your bookmarks in different areas of your site.
As the changes are made to the attribute fields, the CF tag will automatically reflect the choices.
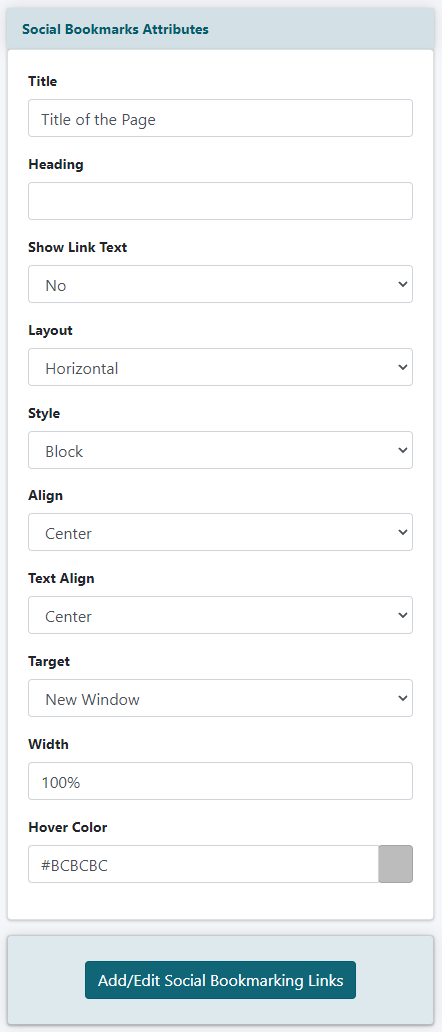
Title
Title of the page when shared
Heading
The headline of the page
Show Link Text
Include the name of the social media site as well as it's icon
Layout
Horizontal will display the social media icons next to each other; vertcial will display them on top of one another
Style
Display the icons in block or standard format.
Align
Display the icons in the center, left or right side of the page
Text Align
Aligns the position of the text
Target
When an icon is clicked, should the social media site open in a new browser window or the same window
Width
Update the social media bookmarks so they are smaller as needed
Hover Color
Enter a hexadecimal color to the box (or choose a color from the color picker. This is the color the icon will be highlighted with when a user hovers over the icon
Click the 'Add/Edit Social Bookmarking Links' button
A preview will be shown reflecting your choices. If you are happy with the look of the social media icons, copy the resulting CF Tag.
If more changes are needed, adjust the attributes above and click the again.
Paste the cf tag anywhere you would like the social bookmarks to appear on your pages (choose 'add or edit pages', 'add or edit department', 'add/edit products', 'edit public or member portals')